TL;DR
- Bedrock just reorganizes WordPress with Composer and environment-based config. It does not need Trellis, Ansible or a VPS: Docker locally plus shared hosting works fine.
- The catch nobody documents: you keep two separate
.envfiles forever, because theDB_HOSTthat works locally never works in production and vice versa. - Deploy with
git pull(vendor/,web/wp/,uploads/and.envstay out of git), point the document root atweb/, and know whatDISALLOW_FILE_MODSchanges about your production workflow.
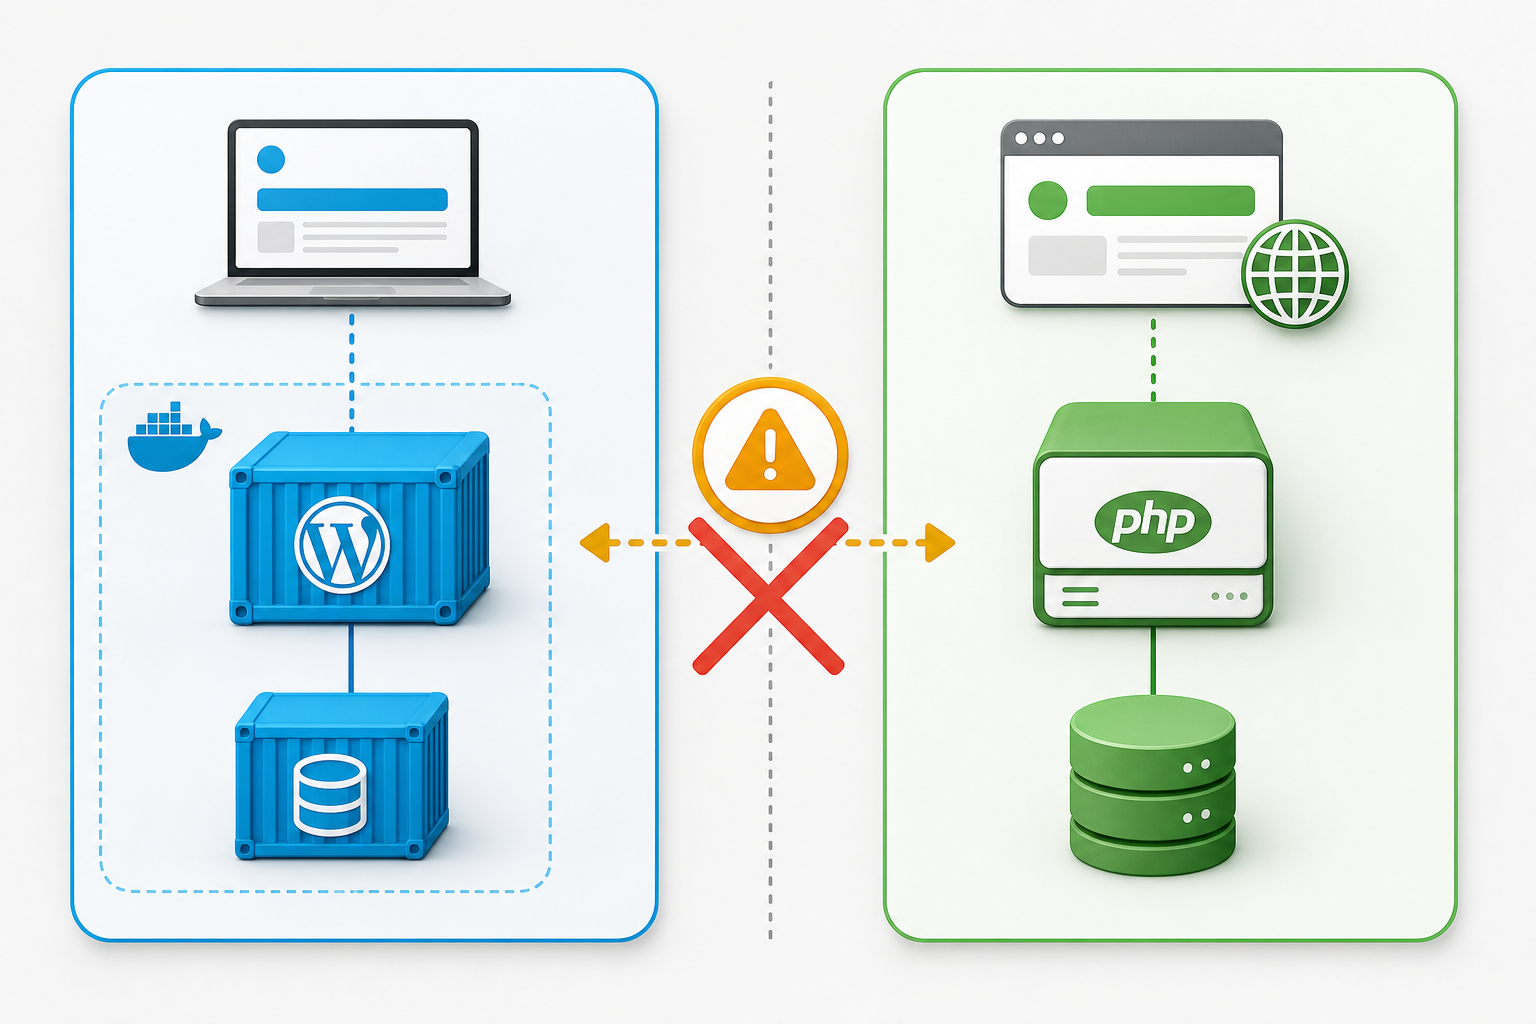
The first time I set up WordPress Bedrock on a shared host, I spent two hours on a database connection error before I understood why. Every tutorial I found showed the same .env file. Every tutorial stopped at docker compose up. None of them mentioned that the DB_HOST value you need locally will never work in production, and the one that works in production will never work locally. They are two different files with two different values and you manage them separately forever. That is not hard once you know it. It just is not written down anywhere.
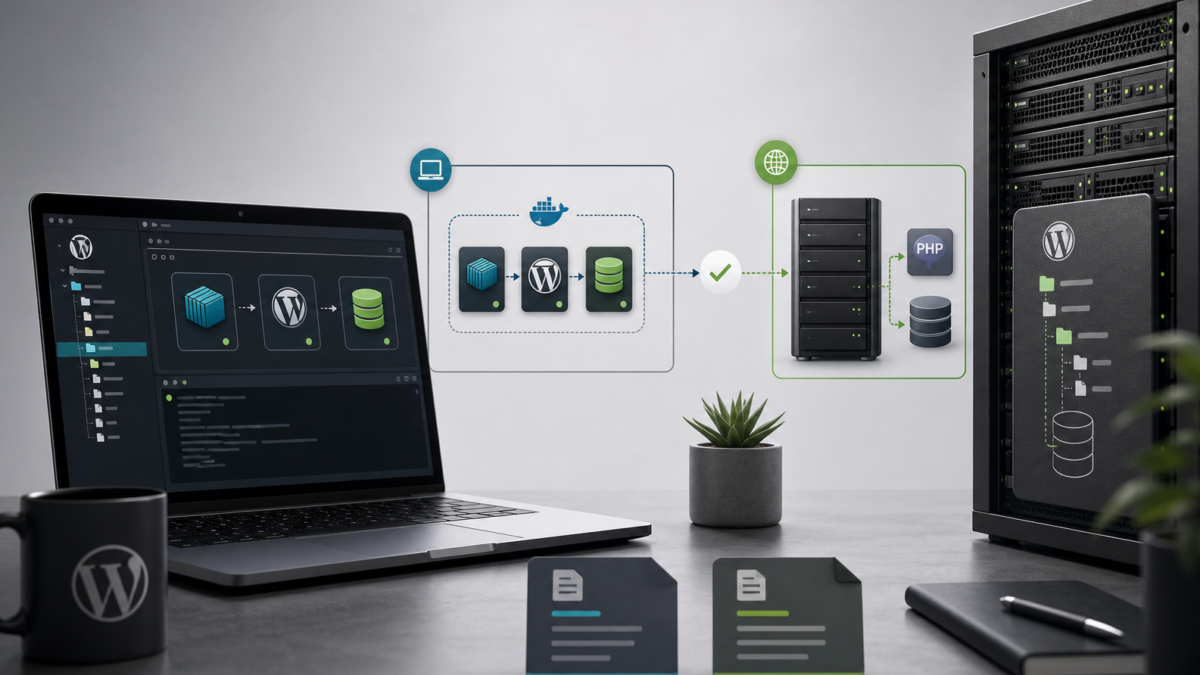
This article covers the exact WordPress Bedrock Docker setup running this site: Docker Compose locally, Hostinger shared hosting in production, git pull deploys, no Trellis, no Ansible, no VPS required. The three sections that do not exist anywhere else are the two-.env problem, the bare-PHP production deploy, and what DISALLOW_FILE_MODS actually does to your workflow. Everything else is here for completeness, but those three are why the article exists.
What Bedrock actually does (and what it does not)
Bedrock is a WordPress boilerplate from Roots that reorganises the standard layout, pulls WordPress core and plugins in via Composer, and replaces wp-config.php with environment-based configuration. That is it. It does not manage servers, it does not run deployments, and it does not require Trellis, despite what the Roots documentation implies.
The directory structure that matters:
your-project/
  config/
    application.php          # reads .env, defines WP constants
    environments/
      development.php        # debug on, file mods allowed
      production.php         # debug off, DISALLOW_FILE_MODS
  web/                       # document root — point your server here
    wp/                      # WordPress core (Composer-installed)
    app/                     # wp-content equivalent
      themes/
      plugins/
      mu-plugins/
      uploads/
    wp-config.php            # minimal bootstrap, loads application.php
    index.php
  composer.json              # pins WP core + plugins as packages
  .env                       # never committed
What stays out of git: vendor/, web/wp/, web/app/uploads/, and .env. Everything else is source-controlled, including composer.lock.
The key detail for shared hosting: the document root must point to web/, not the repo root. If your host sees the repo root, visitors get a directory listing. More on how to set that on Hostinger in the production section.
Prerequisites
- Docker Desktop or OrbStack (Mac) — OrbStack is faster and lighter if you are on Apple Silicon
- Composer 2.x on your host machine (only needed to bootstrap; Docker handles the PHP runtime)
- Git repository on GitHub or GitLab
- SSH access on shared hosting — Hostinger Business plan and above includes SSH
- Basic comfort with
.envfiles and running commands in a terminal
Local Docker Compose setup
Bootstrap the project first:
composer create-project roots/bedrock your-project
cd your-project
Then create your docker-compose.yml. This is what runs on this site locally:
services:
  app:
    image: php:8.4-apache
    platform: linux/amd64
    volumes:
      - .:/var/www/html
    ports:
      - "8880:80"
    depends_on:
      - db
    command: >
      bash -c "
        apt-get update -qq &&
        apt-get install -y -qq libpng-dev libjpeg-dev libzip-dev zip unzip &&
        docker-php-ext-install pdo_mysql gd zip &&
        sed -i 's|/var/www/html|/var/www/html/web|g' /etc/apache2/sites-enabled/000-default.conf &&
        a2enmod rewrite &&
        apache2-foreground
      "

  db:
    image: mysql:8.0
    environment:
      MYSQL_ROOT_PASSWORD: root
      MYSQL_DATABASE: wordpress
      MYSQL_USER: wordpress
      MYSQL_PASSWORD: wordpress
    volumes:
      - db_data:/var/lib/mysql

volumes:
  db_data:
A few things worth naming explicitly. The platform: linux/amd64 line avoids ARM compatibility issues on Apple Silicon. The docker-php-ext-install pdo_mysql step is not optional — without it, PHP cannot talk to MySQL at all and WordPress will show “Error establishing a database connection” regardless of what is in your .env. The document root override points Apache at web/, which is the Bedrock layout. The db service name is what you put in DB_HOST — not localhost, not 127.0.0.1. That is the most common first failure, so it gets its own section below.
Start the stack:
docker compose up -dRun WP-CLI and Composer through the container. If you have a Makefile, these wrappers save a lot of typing:
.PHONY: up down shell wp composer logs

up:
	docker compose up -d

down:
	docker compose down

shell:
	docker compose exec app bash

wp:
	docker compose exec app wp $(CMD) --allow-root

composer:
	docker compose exec app composer $(CMD)

logs:
	docker compose logs -f app
Install dependencies inside the container, not on your host, to avoid PHP version mismatches:
make composer CMD="install"Then install WordPress:
make wp CMD="core install --url=http://localhost:8880 --title='My Site' --admin_user=admin --admin_password=admin [email protected]"The site runs at http://localhost:8880. Do not mount vendor/ or web/wp/ as volumes — those are Composer-managed and should not be overridden by host files.
The two-.env problem
This is the section every tutorial skips. Your local .env and your production .env are completely separate files with incompatible values. Neither is committed to git. You manage them independently.
Here is why they cannot share values:
| Variable | Local (Docker Compose) | Production (Hostinger) |
|---|---|---|
DB_HOST | db (the Compose service name) | 127.0.0.1 or the cPanel internal host |
DB_NAME | wordpress | u336386_prod (cPanel-prefixed) |
DB_USER | wordpress | u336386_wp |
WP_HOME | http://localhost:8880 | https://yourdomain.com |
WP_SITEURL | http://localhost:8880/wp | https://yourdomain.com/wp |
WP_ENV | development | production |
DISALLOW_FILE_MODS | not set (or false) | true |
DB_HOST=db works locally because Docker Compose creates a private network where services reach each other by name. Outside that network, db resolves to nothing. If you set DB_HOST=localhost locally, WordPress tries to connect on a Unix socket, which does not exist inside the container for the MySQL service. The error is “Error establishing a database connection” with no further detail. The fix is one word: change localhost to db.
Manage the two files this way: commit a .env.example with placeholder values and inline comments explaining what each variable should be in each environment. Store the real values in a password manager. Never put them in the repository, Slack, or a shared doc.
# .env.example
DB_NAME=''
DB_USER=''
DB_PASSWORD=''

# Local Docker: use 'db' (the Compose service name)
# Production: use 127.0.0.1 or the cPanel database host
DB_HOST=''

# Local: http://localhost:8880
# Production: https://yourdomain.com
WP_HOME=''
WP_SITEURL="${WP_HOME}/wp"

WP_ENV='development'

# Salts — generate at https://roots.io/salts.html
AUTH_KEY=''
SECURE_AUTH_KEY=''
LOGGED_IN_KEY=''
NONCE_KEY=''
AUTH_SALT=''
SECURE_AUTH_SALT=''
LOGGED_IN_SALT=''
NONCE_SALT=''
Production: bare PHP on Hostinger (no Docker)
Shared hosting does not run Docker. Hostinger Business and above gives you SSH, PHP 8.x, MySQL, and Composer, but no container runtime. That is fine. Bedrock is plain PHP. It does not need containers to run; containers are just a convenient local wrapper.
One-time setup: point the document root at web/
Log into hPanel, go to Hosting, find your domain, and look for “Document root” or “Website directory” settings. Change it from public_html to wherever your web/ directory lives inside the domain root. On Hostinger the path will look something like:
/home/u336386691/domains/yourdomain.com/webThis is a one-time step that most tutorials skip entirely. If you skip it, your visitors land on the repo root and get a blank page or a directory listing. Every other deploy step depends on this being right.
First deploy
- SSH into the server:
ssh your-user@your-host -p 65002(Hostinger uses a non-standard SSH port). - Navigate to the domain root, then clone the repo:
cd /home/u336386691/domains/yourdomain.com git clone [email protected]:youruser/yourrepo.git . - Run Composer to install WordPress core and plugins:
composer install --no-dev --optimize-autoloaderIf Composer is not in
$PATH, download it on the spot:php -r "copy('https://getcomposer.org/installer', 'composer-setup.php');" php composer-setup.php php composer.phar install --no-dev --optimize-autoloader - Create the production
.envmanually:nano .envPaste your production values. The database name and user will have the cPanel account prefix. Find the exact host and credentials in hPanel under Databases.
- Verify the site loads at your domain. If you see a blank page, check that the document root is pointing to
web/, not the repo root.
Ongoing deploys
Every subsequent deploy is the same sequence. I have this memorised:
- Push your changes to
origin/main. - SSH in.
- Pull:
git pull origin main - Run Composer only when
composer.lockchanged:composer install --no-dev --optimize-autoloader - Flush caches:
wp cache flush && wp litespeed-purge all - If you changed slugs, rewrite rules, or permalink structure:
wp rewrite flush --hard
That is the full deploy. It takes under two minutes on a fast connection. The --no-dev flag is important: it skips packages like kint, whoops, and test tools that should never run on a live server.
What DISALLOW_FILE_MODS does to your workflow
Set DISALLOW_FILE_MODS=true in your production .env and the wp-admin plugin and theme installers disappear. WordPress will not let anyone install, update, or delete plugins or themes through the browser. To be precise: DISALLOW_FILE_MODS blocks all file system writes from the browser. Automatic core updates are a separate switch (AUTOMATIC_UPDATER_DISABLED), but in practice both are set to true on a Bedrock production site because all changes go through Composer and git anyway.
This is intentional and it is the right call for a Bedrock setup. Every change goes through Composer and git. You get a clean audit trail, reproducible deployments, and no config drift from someone clicking “update” in wp-admin on a Friday afternoon.
The practical change to your workflow: adding a plugin means editing composer.json, committing, and deploying. For a plugin on the WordPress Packagist registry:
composer require wpackagist-plugin/redirectionCommit the updated composer.json and composer.lock, push, pull on the server, run composer install --no-dev, activate the plugin with WP-CLI:
wp plugin activate redirectionPlugin activation still works — WordPress can activate an already-installed plugin, it just cannot download or write new files. The one thing to document for any collaborator or client: if they try to install a plugin from wp-admin and nothing happens, it is not broken. It is locked intentionally.
Do not set DISALLOW_FILE_MODS=true locally. Your development environment (set via WP_ENV=development loading config/environments/development.php) should leave file modifications enabled so you can test plugins freely before adding them to Composer.
Skipping Trellis: what you actually give up
Trellis is Roots’ Ansible-based server provisioning tool. The Roots documentation treats it as the natural companion to Bedrock, but it is optional and it is not a good fit for shared hosting.
Here is the honest trade-off:
| Trellis + Bedrock | Docker local + bare PHP (this article) | |
|---|---|---|
| Server provisioning | Automated via Ansible playbooks | Manual, one-time hPanel config |
| Zero-downtime deploys | Built in (symlink swap) | Not available; a git pull is live immediately |
| SSL | Automatic via Let’s Encrypt | Handled by Hostinger hPanel (one click) |
| Required infrastructure | VPS or dedicated server | Any shared host with SSH and Composer |
| Learning curve | Ansible, Vagrant or Multipass, Trellis config | Docker Compose basics, SSH |
| Team size fit | 3+ developers, client sites needing rollbacks | Solo dev or small team, personal projects |
Choose Trellis when you have a VPS, need automated rollbacks, or run multiple client sites from one server. Skip it when you are on shared hosting, working alone, and a git pull deploy is fast enough. For a personal portfolio or a small production site, the Trellis overhead is real and the benefits are marginal.
Debugging the most common failures
“Error establishing a database connection” locally
Check DB_HOST in your local .env. If it says localhost or 127.0.0.1, change it to db — the Compose service name. That name is how containers on the same Compose network find each other. Nothing else resolves inside the container.
Composer fails on the server with “command not found”
Hostinger does not always put Composer in $PATH by default. Run which composer first. If it returns nothing, download the installer directly and use php composer.phar for that session, or add the Composer binary to your user path in ~/.bashrc.
WordPress loads but plugins are missing
You pulled but did not run composer install. Plugins are not files you commit — they are Composer packages. If composer.lock changed in the pull, the installed packages are out of date until you run composer install --no-dev.
wp-admin has no plugin installer
DISALLOW_FILE_MODS=true is set in your production .env. This is expected behaviour. Install plugins via Composer and activate via WP-CLI.
Uploads are missing after deploy
web/app/uploads/ is gitignored. User-uploaded files live only on the server filesystem — they are not in your repository. To migrate uploads between environments, use SFTP or a plugin like WP Offload Media. This is a fundamental constraint of git-based deploys, not a Bedrock-specific issue.
Production .env was committed by accident
Add .env to .gitignore immediately if it is not already there (Bedrock’s default .gitignore includes it). Rotate every secret in the file: database password, WordPress salts, any API keys. A committed .env with live credentials needs to be treated as fully compromised, even if the repository is private. Private repositories get leaked.
FAQ
- Do I need Trellis to use Bedrock in production?
- No. Trellis is an optional Ansible provisioning tool from the same team. Bedrock is plain PHP and runs on any server with PHP 8.x, MySQL, and a configured document root. Shared hosting with SSH access is enough.
- Why does DB_HOST need to be “db” and not “localhost” in Docker Compose?
- Docker Compose creates a private network between your services. Services find each other by name, not by IP. The MySQL container is named
dbin the Compose file, so that is the hostname.localhostinside the PHP container refers to the PHP container itself, where there is no MySQL process. - Can I run Composer on Hostinger shared hosting?
- Yes, on the Business plan and above, which includes SSH access. Run
which composerafter connecting. If Composer is not in$PATH, download the installer withphp -r "copy('https://getcomposer.org/installer', 'composer-setup.php');"and invoke it asphp composer.phar. - What does DISALLOW_FILE_MODS=true break in WordPress?
- It removes the plugin and theme installers from wp-admin and blocks all file system writes from the browser. Plugin activation still works — WordPress can activate an already-installed plugin, it just cannot download or write new files. Everything goes through Composer and git instead.
- How do I handle WordPress uploads between local and production?
web/app/uploads/is gitignored. To work with production media locally, use SFTP to pull the uploads directory down, or mirror it withrsync. For a serious production site, WP Offload Media moves uploads to S3 or compatible object storage, which both environments can access.- Can I use this setup with Polylang or other mu-plugins?
- Yes. Plugins that require mu-plugin loading work exactly the same way: add a loader file to
web/app/mu-plugins/and commit it to git. Polylang Pro, for example, lives inweb/app/mu-plugins/polylang-pro/with apolylang-pro-loader.phpalongside it. Both files are committed; no special Docker configuration is needed.
Related articles
- CSS works locally but breaks in production covers the LiteSpeed UCSS problem that shows up after you get Bedrock running on Hostinger — the next sharp edge after this one.
- AI agents in the development workflow covers the safe deploy and verification loop I use after every
git pullon this stack.