An article for those who have already worked with the terminal
This guide assumes basic skills with Ubuntu/Linux, Git, and Telegram bots. If any of that sounds unfamiliar, no problem: any AI chat will walk you through it step by step. Just describe what you’re doing and ask ChatGPT, Gemini, Claude, or another tool of your choice. They handle the basics better than any static guide.
TL;DR
- The guide starts from an Ubuntu install that’s already in place: budget a few hours for the base system and separate time for the vault, skills, and the end-to-end test.
- We’ll build a Telegram journal on Hermes Agent with DeepSeek, local speech recognition, and a private Git repository.
- Text, voice, and images travel down separate, verifiable paths, and the raw originals are always kept right next to the final entry.
- Every step ends with a check, so a mistake is caught right there instead of when you fire up the whole system.
In the first article I described how an old Xiaomi Mi Gaming Laptop became a home AI server for a wellbeing journal, and why, after a month with OpenClaw, I rebuilt the system from scratch on Hermes Agent and DeepSeek. Now for the interesting part: reproducing my configuration from zero. This is the guide I wish I’d read myself back in early 2026, instead of piecing it together one fragment at a time.
I deliberately built it around the principle of “step, check, next step”. When I assembled the first version of the system, my main mistake was setting everything up at once and then spending two evenings figuring out which of the six components had gone silent. Don’t repeat it: verify each layer on its own.
The guide is long, but the route is simple. First we give the agent a voice and a communication channel, then teach it to turn messages into your files, and finally add memory, backup, and habit. After each stage, the system can already do something complete:
- Steps 1–6: the bot responds to text, voice, and images.
- Steps 7–9: messages become a verifiable Markdown archive with change history.
- Steps 10–12: the journal becomes a daily system, survives reboots, and reminds you on its own.
You do not need to finish everything in one evening. The best first stopping point is after the voice test in step 5; the second is after the first successful commit in step 9. A useful intermediate system is better than an exhausted person debugging vision, Git, and cron at two in the morning.
Don’t copy commands before checking versions
Hermes Agent moves fast. The current audit was done on Hermes v0.12.0 (2026.4.30), commit 4f3766917 and Ubuntu 24.04.4 LTS; verification date: 2026-06-07. For a newer version, cross-check against the official repository.
Verified voice configuration
NVIDIA driver 535.309.01, GTX 1060 6 GB, CUDA 12.2, ffmpeg 6.1.1, and faster-whisper 1.2.1. The medium model runs on CUDA with int8_float32; 22 seconds of test audio were transcribed in 2.17 seconds.
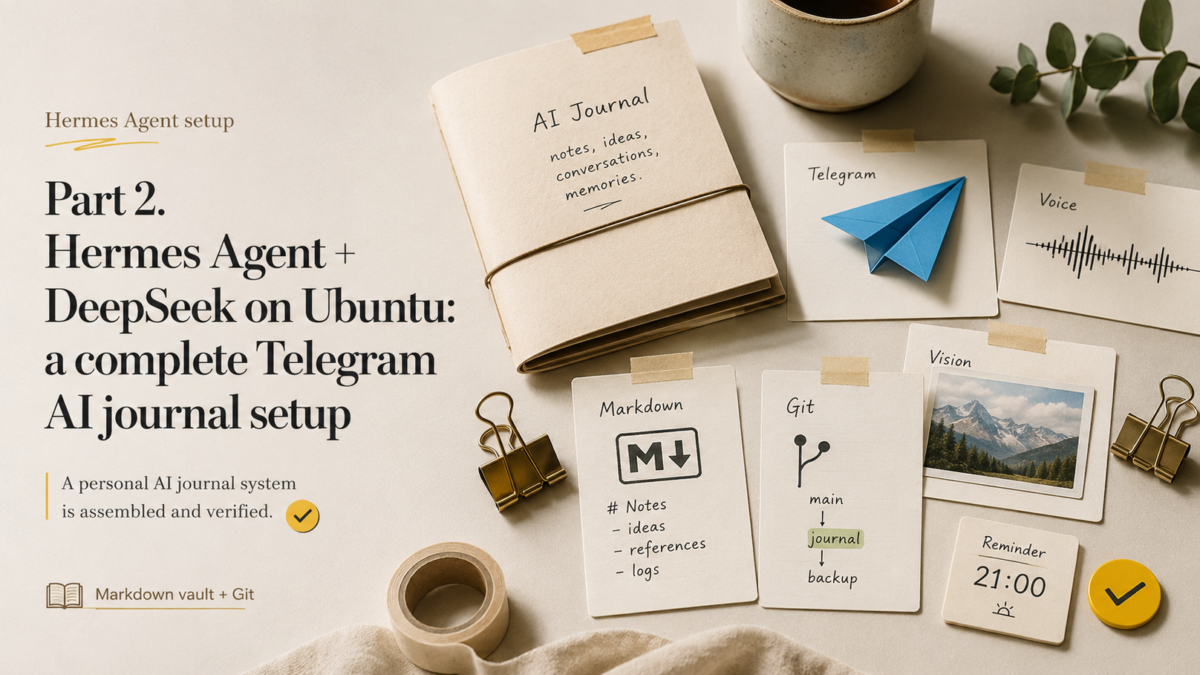
Part 2 of 3: installation from scratch
What we’re building

The same system in text form:
Telegram (you only, by allowlist)
        │
        ▼
Hermes Gateway on the Ubuntu machine (systemd, must run continuously)
  ├─ DeepSeek: text normalization of entries
  ├─ faster-whisper: local recognition of voice messages
  ├─ auxiliary vision: a separate provider for images
  ├─ skills: wellbeing-journal + wellbeing-reflection
  └─ cron: a reminder every evening at 21:00
        │
        ▼
Markdown vault (Obsidian-compatible)
        │
        └─ git commit → private GitHub repository
For hardware, any machine works that can run reliably around the clock and meets the requirements of the components you pick. In my case it’s a 2019 gaming laptop on a shelf in the home office: its GPU speeds up speech recognition, but faster-whisper runs on CPU too, just slower. The configuration to pin down before publication:
| Component | Mine | Minimum |
|---|---|---|
| OS | Ubuntu 24.04.4 LTS, kernel 6.17.0-22-generic, x86_64 | Current stable Ubuntu |
| CPU/RAM | Intel i7-8750H (6C/12T), 15 GiB RAM / 10 GiB available | Any x86-64, 8 GB RAM |
| GPU | GTX 1060 Mobile (6 GB) + Intel UHD 630; NVIDIA 535.309.01, CUDA 12.2 | Not required (CPU-mode STT) |
| Disk | NVMe 154 GB, 84 GB free (43%) | 20 GB free |
| Hermes Agent | v0.12.0 (2026.4.30), commit 4f3766917 | Same version as in the article |
Before you start: Ubuntu, accounts, and secrets
I’m deliberately leaving the Ubuntu install out of scope: there are plenty of good guides for it, so start with the official Ubuntu Server documentation. The starting point of this guide: a clean, updated system, internet access, and a user with sudo.
Get these ready in advance so you’re not jumping between tabs later:
- a Telegram account (the bot is created for free via BotFather);
- a DeepSeek platform account and a payment method for the API key;
- an OpenAI account with a small budget for the vision layer (optional; text and voice work without it);
- a GitHub account with two-factor authentication enabled;
- Obsidian on the desktop for browsing entries (optional; the vault stays plain Markdown).
A rule for secrets that holds for the whole guide
API keys and tokens live only in ~/.hermes/.env and your password manager. Never: in the vault, in the Git repository, in screenshots. Every key in this article is a placeholder; don’t try to use them.
And one last thing: decide where the machine will live. My laptop lives on a wall shelf above head height. The reason is mundane: the cat. If you have pets, four-year-olds, or other sources of chaos, think this through before the system becomes part of your daily routine.
Step 1. Prepare Ubuntu
Update the system and install the base dependencies:
sudo apt update && sudo apt upgrade -y
sudo apt install -y git curl ffmpeg python3
ffmpeg is needed to convert Telegram voice messages before recognition, and Python is for Hermes and helper scripts. In the verified configuration, ffmpeg 6.1.1 is installed. A standalone uv was not found in PATH initially; if uv --version doesn’t respond, install it following the official astral.sh/uv instructions, or use the Hermes environment from ~/.hermes/hermes-agent/venv/.
Check the timezone right away: it decides whether the evening reminder actually arrives in the evening.
timedatectl
# if needed:
sudo timedatectl set-timezone Europe/Madrid
If you plan to use a GPU for speech recognition, confirm the system sees the card:
nvidia-smi # verified: GTX 1060 6 GB, driver 535.309.01, CUDA 12.2
Check: timedatectl shows your timezone, and ffmpeg -version responds without errors.
If it didn’t work: don’t go any further. Every next step builds on this one.
Step 2. Install Hermes Agent
The official install is a single command. But before running any curl | bash from the internet, including this one, open the URL in a browser and read the script: you should understand what you’re about to run on the machine that will hold your personal journal.
curl -fsSL https://raw.githubusercontent.com/NousResearch/hermes-agent/main/scripts/install.sh | bash
echo $SHELL            # find out the active shell
source ~/.bashrc       # bash is the default on Ubuntu
# source ~/.zshrc      # if you've switched to zsh
Then diagnostics:
hermes doctor
hermes --version
At this point things did not go smoothly for me on the first try. After installation, the hermes command was simply not found in PATH, even though the installer had finished without errors. The problem turned out to be trivial: the new shell hadn’t re-read its config. source ~/.bashrc — and everything started working. But I spent those few minutes staring at a blank terminal, and I think of them every time I see source ~/.bashrc in a manual and think “obvious, skip it”.
Check: hermes doctor shows no critical problems, and hermes --version prints a version. Write it down: it’s your reference point for any troubleshooting.
Expected result: the critical checks pass; in the 2026-06-07 audit, hermes doctor showed PASS on the critical checks plus minor OAuth warnings.
If it didn’t work: most often it’s PATH: restart the terminal or source your shell config again.
Step 3. Connect DeepSeek for text
DeepSeek in this architecture is the workhorse. Initially I wanted to connect a stronger model — I already had paid subscriptions. But when I calculated how many tokens a daily routine consumes with heartbeat, check-in and cron jobs, it became clear that flagship models for an evening journal are the wrong solution. DeepSeek normalizes entries quickly and cheaply, and a strong model can be connected selectively for monthly reflection.
Create an API key in your account on the official DeepSeek platform and launch the interactive model picker:
hermes model
Pick DeepSeek from the list of providers and enter the key when Hermes asks for it: it’ll store the secret in ~/.hermes/.env as DEEPSEEK_API_KEY. Don’t edit the files by hand as long as the CLI can do it itself. If the interactive picker doesn’t appear (for example, a headless session with no TTY), the verified version uses the keys model.default, model.provider, and model.base_url in ~/.hermes/config.yaml.
The current model ID as of the verification date: deepseek-v4-flash. The current prices for this check: cache hit $0.0028, cache miss $0.14, output $0.28 per 1M tokens (verified: 2026-06-07; before setup, open the official pricing page).
A smoke test without leaving the terminal:
hermes -z "Answer in one word: working?"
Check: the agent answers, and the response shows the DeepSeek model was used.
If it didn’t work: confirm the key is written to ~/.hermes/.env, that the DeepSeek account has a positive balance, and that the model ID isn’t stale (that happens).
Step 4. Create a Telegram bot and lock it down
First we create the bot through Telegram’s official tool:
- Open Telegram and find @BotFather (blue checkmark, the official one).
- Send the command
/newbot. - BotFather will ask for the bot’s name (the display name, for example “My Wellbeing Journal”) and a username (it has to end in
_bot, for examplemy_wellbeing_bot). - In return you’ll get an HTTP API token like
7123456789:AAF.... Save it to your password manager right away: it’s shown only once, after that you can only reset it via/revoke.
Next you’ll need your numeric user ID. The simplest way to find it: message @userinfobot in Telegram and it’ll reply with your ID on a single line. Write it down next to the token. The current Hermes path: run hermes gateway setup or send /whoami to the bot in a Telegram DM after connecting it.
Connect the gateway:
hermes gateway setup
The setup wizard will ask for the bot token. The most important thing in this step: the allowlist. The final configuration should contain:
# ~/.hermes/.env
TELEGRAM_ALLOWED_USERS=123456789   # your numeric ID, placeholder
Most of my time went not on models or Ubuntu, but on working out the difference between chat ID, user ID, and the allowlist. These are three different settings that are easy to mix up, and I mixed them up:
| Setting | What it controls |
|---|---|
TELEGRAM_ALLOWED_USERS | Who is allowed to talk to the bot at all. Authorization. |
TELEGRAM_HOME_CHANNEL | Where the bot delivers messages by default (for example, cron reminders). The delivery address. |
--deliver telegram:<chat id> | An explicit delivery address for a specific cron job. |
Specifying a chat ID for delivery isn’t enough to lock the bot down: without an allowlist it stays open to anyone who finds it by name. A personal journal with an open door is the worst possible combination.
Start it and check:
hermes gateway            # foreground, for the first check
# then, for continuous operation:
hermes gateway install    # installs the systemd service
hermes gateway status
Check: message the bot “hi” from your own account: it should reply. Ask someone on another account to message it: the bot should stay silent.
If it didn’t work: check the logs (~/.hermes/logs/gateway.log); most often the problem is the token, or that the allowlist holds a username instead of a numeric ID.
Step 5. Local faster-whisper for voice
Voice messages are the system’s main interface. The message itself goes through Telegram, but after delivery Hermes recognizes it with local faster-whisper, without sending the audio off to yet another cloud STT provider. The voice dependency is installed like this:
cd ~/.hermes/hermes-agent
uv pip install -e ".[voice]"
The command runs in the environment managed by the Hermes install. On the verified system the virtualenv is at ~/.hermes/hermes-agent/venv/. If a standalone uv isn’t found in PATH, first restore/install uv, or use the documented Hermes update/install path for this version.
The actual STT config as of 2026-06-07:
stt:
  enabled: true
  provider: local
  local:
    model: medium
    language: ''
This config selects the multilingual faster-whisper medium model. The verified runtime uses faster-whisper 1.2.1, device cuda, and compute type int8_float32.
Next comes the choice of model size, and here’s the honest fork in the road:
- base: fast even on CPU, usually enough for short everyday notes in a single language;
- medium: noticeably more accurate on mixed speech and jargon, but it needs a GPU or patience;
- the verified configuration:
medium, CUDA on a GTX 1060 6 GB,int8_float32; 22 seconds of audio are processed in 2.17 seconds.
A tip from running it: don’t chase the bigger model right away. After a couple of weeks you’ll see which words get recognized consistently badly, and a contextual correction dictionary (it shows up in the third article) fixes that more cheaply than moving to a heavy model.
Check: send the bot a 20–30 second voice message in your language. In the control test, 22 seconds of audio were transcribed in 2.17 seconds on the GPU.
If it didn’t work: check ffmpeg, the faster_whisper import in the Hermes venv, nvidia-smi, free RAM/VRAM, and the gateway logs.
Cloud STT as a fallback
Hermes has cloud STT alternatives (Groq, OpenAI, Mistral). They’re faster on weak hardware, but every voice message then goes off to a third party. For a wellbeing journal I consider that unacceptable by default: choose the cloud deliberately, not because it’s easier.
Step 6. A separate vision layer for images
A quick reminder of how the picture path works: in this setup DeepSeek handles the text, while workout screenshots from Hevy and photos of documents go through a separate auxiliary vision layer. That’s a separate provider with a separate budget; in my case the OpenAI API with a small spending limit. This step is optional: I connect vision when I feel like it and use it fairly rarely, so if you don’t need images you can skip it and live comfortably on text plus voice.
# ~/.hermes/config.yaml
auxiliary:
  vision:
    provider: openai
    model: auto  # the resolved model needs to be confirmed in the logs before publication
# ~/.hermes/.env
OPENAI_API_KEY=sk-placeholder
If you’ve never worked with the OpenAI API: the key is created in the API keys section, and the spending limit is set in the billing/usage sections of your account. Set a hard monthly ceiling right away: vision requests cost more than text ones, you’ll be sending screenshots every day, and the ceiling turns a possible surprise, in the worst case, into “the bot stopped seeing pictures for the rest of the month”.
Check: send the bot any screenshot with no personal data, for example a terminal window. The bot should describe what’s in the image.
If it didn’t work: compare the model name against the current OpenAI documentation, check the key and the logs. The typical symptom of a disconnected vision layer: the bot answers text fine but replies to an image with “I don’t see an image” or a provider error. The symptom of a stale model ID: a model-not-found error in the gateway logs.
You can stop here for the night
If text, voice, and a test image are going through, you already have a working Telegram agent. The next steps don’t make it smarter — they give it memory. The vault, Git, and cron can wait until the next evening.
Step 7. Create the Markdown vault
The first version of the archive looked much more correct. There was an inbox folder, nested categories, numbered levels, and even a folder for “unsorted”. A month later I realized I was spending more time maintaining the structure than writing entries. So the current vault looks almost boring — and that’s exactly the point:
wellbeing-journal/
├── daily/YYYY/MM/YYYY-MM-DD.md        # one entry per day, canonical name
├── weekly/YYYY/YYYY-Www.md            # weekly summaries
├── monthly/YYYY/YYYY-MM.md            # monthly reflections
├── notes/
│   ├── terminology.md                 # your terms: exercises, supplements
│   ├── measurements-history.md        # history of measurements
│   └── known-asr-errors.md            # recognition correction dictionary
├── documents/
│   ├── lab-results/YYYY/MM/
│   └── reports/YYYY/MM/
├── attachments/YYYY/MM/YYYY-MM-DD/    # original screenshots and photos
├── audio/                             # voice messages, per retention policy
├── templates/
│   ├── daily.md
│   ├── weekly.md
│   ├── monthly.md
│   └── lab-result.md
├── scripts/
│   ├── validate-entry.sh
│   ├── build-reflection-context.sh
│   ├── sync-to-mobile.sh
│   └── commit-entry.sh
├── _system/
│   ├── schema.md                      # frontmatter contract
│   ├── scales.md                      # definitions of the 1–10 scales
│   ├── safety.md                      # medical boundaries of the skill
│   └── retention-policy.md
├── dashboards/
├── JOURNAL_GUIDE.md
├── .gitignore
└── .obsidian/
The system’s key contract: Markdown for the human, YAML for the automation. The body of the entry stays free text, while everything the dashboards and reflections will later read lives strictly in the frontmatter:
---
date: 2026-06-06
schema_version: 1
sleep_hours: 7.5
sleep_quality: 4
energy: 3
mood: 4
stress: 2
pain: 0
training: strength
symptoms: []
medications_changed: false
source: telegram
needs_review: false
---
Three rules I later paid dearly to fix in my own archive:
- an unknown value stays
nullor empty; the model never substitutes 0 for “didn’t say”; - the date in the frontmatter must match the filename;
- the scales (mood, energy, stress) are defined in
_system/scales.mdwith anchors, and the user’s self-assessment always outweighs “scoring by message tone”.
Scale anchors protect against semantic drift. Without them, the model will eventually decide that “everything is annoying” means high stress, when for you it means low energy. My working anchors from _system/scales.md:
## Mood
- 1–2 — depressed, gloom | 3–4 — irritated, everything annoys
- 5–6 — flat, neutral (this is normal!) | 7–8 — uplifted | 9–10 — euphoria

## Energy
- 1–2 — switched off | 3–4 — sluggish, afternoon crash
- 5–6 — working mode | 7–8 — energized | 9–10 — hyperactive

## Stress
- 1–2 — calm | 3–4 — mild background
- 5–6 — noticeable pressure | 7–8 — anxiety, poor sleep | 9–10 — crisis
Important note on mood: 5–6 is the norm, not “bad”. And the main tip on scoring: don’t think. The first number that comes to mind is the right one. The longer you deliberate between four and five, the less that number means.
Check: create the structure, drop in one test daily file from the template, and open the folder in Obsidian: the vault should open with no errors and no required community plugins.
Step 8. Skills: a core without a monolith
Hermes skills live in ~/.hermes/skills/, each in its own folder with a mandatory SKILL.md. My first version of the journal skill was a single file hundreds of lines long, and verifying its behavior was impossible. The working layout: two skills, each with a short core and references pulled out into separate files.
~/.hermes/skills/personal/wellbeing-journal/
├── SKILL.md                  # short core: flow and routing rules
├── references/
│   ├── schema.md             # copy of the frontmatter contract
│   ├── input-text-voice.md   # handling text and voice messages
│   ├── input-images.md       # handling images and OCR
│   ├── safety.md             # medical boundaries
│   ├── provenance.md         # source rules
│   └── git-workflow.md       # commit rules
├── templates/
│   └── confirmation.md       # Telegram confirmation template
└── scripts/
    ├── validate_entry.py
    ├── upsert_daily.py
    └── safe_commit.sh

~/.hermes/skills/personal/wellbeing-reflection/
├── SKILL.md                  # weekly/monthly analysis only
├── references/
│   ├── reflection-rubric.md
│   └── medical-boundaries.md
└── scripts/
    └── build-reflection-context.sh
The journal skill’s core in full. For Hermes v0.12.0 it needs YAML frontmatter with the mandatory fields name and description:
# wellbeing-journal

You keep the user's personal wellbeing journal. You are a journaling
assistant, not a doctor: you don't make diagnoses, you don't prescribe or
cancel treatment, you don't interpret urgent symptoms. Full rules: references/safety.md.

## Input formats

- Text: a daily note or a reply to the evening check-in.
- Voice: the transcript is already prepared by the system. Rules: references/input-text-voice.md.
- Images: workout screenshots and photos of documents. Rules: references/input-images.md.

## Main flow

1. Determine the entry date. If the date is ambiguous, ask ONE clarifying question.
2. Extract only explicitly stated facts. Don't infer values.
   A missing metric stays null, never 0.
3. Normalize the scales per _system/scales.md. The user's self-assessment
   outweighs your reading of the tone.
4. Gather the missing REQUIRED fields into one compact question
   ("Sleep / energy / mood / stress as numbers on one line?").
   Don't ask for optional fields.
5. Write to the canonical path daily/YYYY/MM/YYYY-MM-DD.md via scripts/upsert_daily.py:
   reprocessing the same date updates the file, doesn't create a new one.
6. Save the raw input (transcript, text) in a Raw section separate from the Summary.
   Never overwrite Raw with your interpretation.
7. Mark data from images as needs_review: true and source: ocr.
8. Run scripts/validate_entry.py. If validation fails, report the error,
   don't commit.
9. Commit only via scripts/safe_commit.sh (which also runs the secret scan).
10. Send a short confirmation per templates/confirmation.md: what was saved,
    which fields are filled in, what's left as needs_review.

## Forbidden

- Medical conclusions, diagnoses, advice on medications and dosages.
- Interpreting lab values without units and reference ranges.
- Git push when secrets are suspected in the entry.
- Creating files with -2, FINAL, evening suffixes or any variations on the
  canonical name.
- Copying system logs, provider errors, and cron output into the journal:
  those are operational events, not observations about wellbeing.
The full listings of references, templates, and helper scripts are better moved into a separate fixture after the final command check. Until such a repository exists, the article shouldn’t promise a ready-made link. We’ll go through the reflection skill in detail in the third article; for the install it’s enough to create its skeleton.
Check: send the bot the text “Slept 7 hours, energy 4, mood 4, stress 2, no training”. A file daily/2026/06/2026-06-06.md should appear with filled-in frontmatter and your text in the Raw section. Send a correction, “correction: slept 6 hours”: the file should update, and a second file should not appear.
If it didn’t work: check that the skill is visible to the agent (hermes skills list), and that SKILL.md points to the right vault paths.
Step 9. A private Git repository
Git here solves two problems: backup and a history of corrections. When you fix a recognition error in an old entry a month from now, the git history is exactly what shows what changed and when.
cd ~/wellbeing-journal
git init
git add .
git commit -m "Initial vault structure"
Create an empty private repository on GitHub and connect it via an SSH key or the system credential helper. Don’t use a plaintext token in the remote URL: it’ll stay in the config forever.
git remote add origin [email protected]:youruser/your-private-journal.git   # placeholder
git push -u origin main
A mandatory .gitignore before the first meaningful commit:
.obsidian/workspace*
.trash/
*.tmp
.DS_Store
And a rule worth learning before, not after: deleting a file in a later commit doesn’t remove it from history. If a token or a photo of a document with personal data ever lands in the repository, a simple “delete and commit” won’t help: you’ll need to rewrite history and rotate the secret. I lived through this on a work project and wrote it up in a separate article, how we cleaned out accidentally pushed secrets: better to read it before you need it.
That’s why safe_commit.sh runs a primitive but working secret scan before every commit. A skeleton that’s easy to extend with your own patterns:
#!/usr/bin/env bash
# safe_commit.sh — commit only after a secret scan
set -euo pipefail
cd "$(dirname "$0")/.."

# Patterns: DeepSeek/OpenAI keys, Telegram bot token, generic
PATTERNS='sk-[A-Za-z0-9]{16,}|DEEPSEEK_API_KEY=|OPENAI_API_KEY=|[0-9]{8,10}:[A-Za-z0-9_-]{30,}'

if git diff --cached --diff-filter=ACM -U0 | grep -qE "$PATTERNS"; then
  echo "STOPPED: a possible secret was found in the staged changes." >&2
  exit 1
fi

git commit -m "${1:-Update journal entry}"
git push || echo "Push deferred: entries saved locally."
The full version with entry-schema validation should only be published together with a verified fixture. Until then, the article keeps a minimal safe example and a checklist before push.
Check: do a test push, then clone the repository into another directory and confirm the vault opens from the fresh clone. That’s both a backup check and a restore rehearsal.
If it didn’t work: it’s almost always the SSH keys. ssh -T [email protected] will show whether you’re authorized.
At this point you can already switch it off and use it
Files are in place, change history exists, restore is tested. Everything below is improvements, not required steps.
Step 10. Obsidian and reading on your phone
On the desktop it’s simple: open ~/wellbeing-journal as a vault. With the phone it’s trickier, and here I’ll give honest advice instead of pretty advice: don’t attach two sync mechanisms to one folder. Git and iCloud/Obsidian Sync writing to the same vault at the same time will, sooner or later, cause a conflict on the most valuable file.
My working setup: the canonical vault lives in Git on the server, and a one-way read-only mirror goes to the iPhone (scripts/sync-to-mobile.sh does an rsync --delete into an iCloud folder, excluding .git). I read the journal on my phone but only write to it through the bot. Edits made on the phone in the mirror get overwritten by the next sync, and that’s a deliberate limitation, not a bug.
Alternatives: official Obsidian Sync as the only mechanism (no Git), or desktop-only mode. The Obsidian Git mobile implementation is experimental and doesn’t support SSH; I wouldn’t bet on it.
Check: run sync-to-mobile.sh first with --dry-run and review the list of actions, then a real run and a check on the phone.
Step 11. The 21:00 reminder
The final touch that turns a pile of components into a habit. First, pin the timezone in the Hermes config:
# ~/.hermes/config.yaml
timezone: "Europe/Madrid"
An empty value means the server’s local time; explicit is always more reliable. Then, before trusting the syntax from any article, including mine:
hermes cron create --help
Create the job:
hermes cron create "0 21 * * *"
  "Remind me to fill in the evening wellbeing check-in: sleep, energy, mood, stress, symptoms, training, and the important events of the day. Don't draw medical conclusions."
  --name "Evening wellbeing check-in"
  --deliver telegram
Cron jobs are executed by the gateway daemon. Creating a job is not enough — the gateway must be running continuously, which is exactly why we installed it as a systemd service in step 4.
And don’t take the schedule on faith. Create a test job for two minutes from now and check the actual delivery time:
hermes cron create '2m' 'Send exactly one word: TEST' --name 'STT Smoke Test Confirm' --deliver telegram
hermes cron list
# after the check:
hermes cron remove <job_id>
My first reminder arrived on time, but only because I ran this two-minute test and caught the discrepancy in advance. One important detail here: removal works only by job ID, not by job name. An hour of debugging the timezone on launch evening, or two minutes of testing: the choice is obvious.
Check: the test job arrived in Telegram at the expected local time; hermes cron list shows the permanent 21:00 job.
If it didn’t work: check hermes gateway status, the timezone in the config, and TELEGRAM_HOME_CHANNEL: a bare --deliver telegram delivers exactly there.
Step 12. The end-to-end test
Now run the whole system through, like one day in the life:
| Test | Expected result | Where to look for the error |
|---|---|---|
| Text check-in | One daily entry and one commit | Gateway, skill, vault permissions |
| Voice message | Raw audio, transcript, and a structured entry for the same date | Whisper, GPU/CPU, codec, ffmpeg |
| Workout screenshot | Attachment saved, training fields filled, source: ocr | Vision API, limits, MIME |
| Demo photo of a document | Data extracted, but marked needs_review: true | Vision layer, skill rules |
| Resending | The entry is updated with no duplicate and no suffixed files | upsert logic, canonical path |
| Machine reboot | Gateway came up on its own, the bot answers | systemd service |
| Push with Wi-Fi off | Entry saved locally, push catches up later, no data loss | git-workflow in the skill |
The end-to-end test takes about twenty minutes, and they’re the best twenty minutes of the whole install: after them you trust the system enough to hand it a real evening check-in.
End-to-end test passed
The bot accepts all formats, updates a single entry, survives a reboot, and doesn’t lose data when Wi-Fi is off. You can send your first real evening check-in.
Final checklist
- [ ]
TELEGRAM_ALLOWED_USERSholds only your numeric ID, and the bot stays silent for strangers. - [ ] All secrets are in
~/.hermes/.envand your password manager, none in the vault, Git, or screenshots. - [ ] The timezone is verified with a real test job, not an assumption.
- [ ] Voice messages are recognized locally, and latency is measured.
- [ ] The vision layer is configured separately, with a spending limit on the provider account.
- [ ] Resending for the same date updates the entry, and duplicates aren’t created.
- [ ] Raw input is saved separately from the normalized summary.
- [ ] The repository is private, 2FA is on, and a fresh clone opens in Obsidian.
- [ ] The gateway survives a machine reboot without a manual start.
How to update Hermes Agent
Hermes moves fast, and one day you’ll need an update. For the verified version the update command is hermes update, then always hermes doctor and hermes --version, a hermes gateway status check, and one test message to the bot. After major updates, cross-check the skills header format: breaking changes happen in fast-moving projects.
Common mistakes
A token in the remote URL
A plaintext token in the repository address stays in the config and history forever. SSH key or credential helper only.
Expecting DeepSeek to read the picture itself
In this architecture text and images travel different paths. DeepSeek handles the text, while pictures go through a separate auxiliary vision layer: its own setup step and its own budget (in my case a small OpenAI API limit).
Chat ID instead of an allowlist
The delivery address and the right to talk to the bot are different settings. Without TELEGRAM_ALLOWED_USERS the bot is open to everyone.
Cron without a timezone check
First a test job two minutes out, then the permanent schedule. Otherwise “21:00” turns out to be server time, not yours.
Two sync mechanisms on one vault
Git plus iCloud writing to the same folder at once will, one day, cause a conflict. One canonical source, everything else a one-way mirror.
Set everything up at once, then debug
Six layers configured with no checks in between take longer to debug than to install. Step, check, next step.
What’s next
The strangest moment comes after all the installation. You’ve spent hours with Ubuntu, keys, systemd, and Git, and then you send the bot your first voice message. A couple of seconds later a Markdown file appears, and suddenly you realize that this was what the whole thing was built for.
The system is built and verified, but the interesting part begins afterward: the first week of entries, the first recognition errors, the first weekly summaries, and the question “so what do I actually do with all this now”. That’s what the third article is about: daily operation, honest monthly reflection without a made-up RAG, dashboards in Obsidian, real cost broken down by layer, and privacy. That’s where I’ll tell you how the journal caught my “melatonin → wrecked morning” link, which I hadn’t noticed myself.
FAQ
Do I need a GPU?
No. faster-whisper runs on CPU, recognition just takes longer. On my GTX 1060, the medium model processed 22 seconds of audio in 2.17 seconds.
Will a Raspberry Pi or VPS do?
The text path: yes. Local speech recognition on weak ARM will be painful, and a VPS adds the question of trusting the host that holds your journal. An old x86 laptop is the sweet spot.
Can I do it on Windows or macOS?
Hermes supports other platforms too, but the happy path of this guide is limited to Ubuntu. The commands can only be considered reproducible after the version block is filled in and the end-to-end test is done. On macOS the general logic is the same; the differences start with installing dependencies and autostart.
How long does the install take?
For me personally, the migration from the previous system took a few hours, but that’s not a universal benchmark. For a first run it’s sensible to budget one session for the base system and a separate one for the vault, skills, and the end-to-end test, especially if you end up wrestling with the GPU, systemd, or Telegram delivery.
Where is my data physically stored and who has access to it?
The entries and originals live on your machine and in a private GitHub repository. Along the way they’re seen by Telegram (including voice messages), DeepSeek (text), and the vision provider (images). Local faster-whisper rules out sending the audio to an extra STT provider, but it doesn’t take Telegram out of the chain. A private repo is access control, not encryption: a detailed breakdown of the trust boundaries is in the third article.
How much does DeepSeek cost per month with daily use?
The cost of the text layer depends on the actual token count and the current rates: cached input, uncached input, and output are counted separately. Vision is billed separately and, with frequent images, can become a noticeable part of the budget. I give the calculation formula and a dated price snapshot in the third article; before setup, cross-check against the official DeepSeek pricing page.