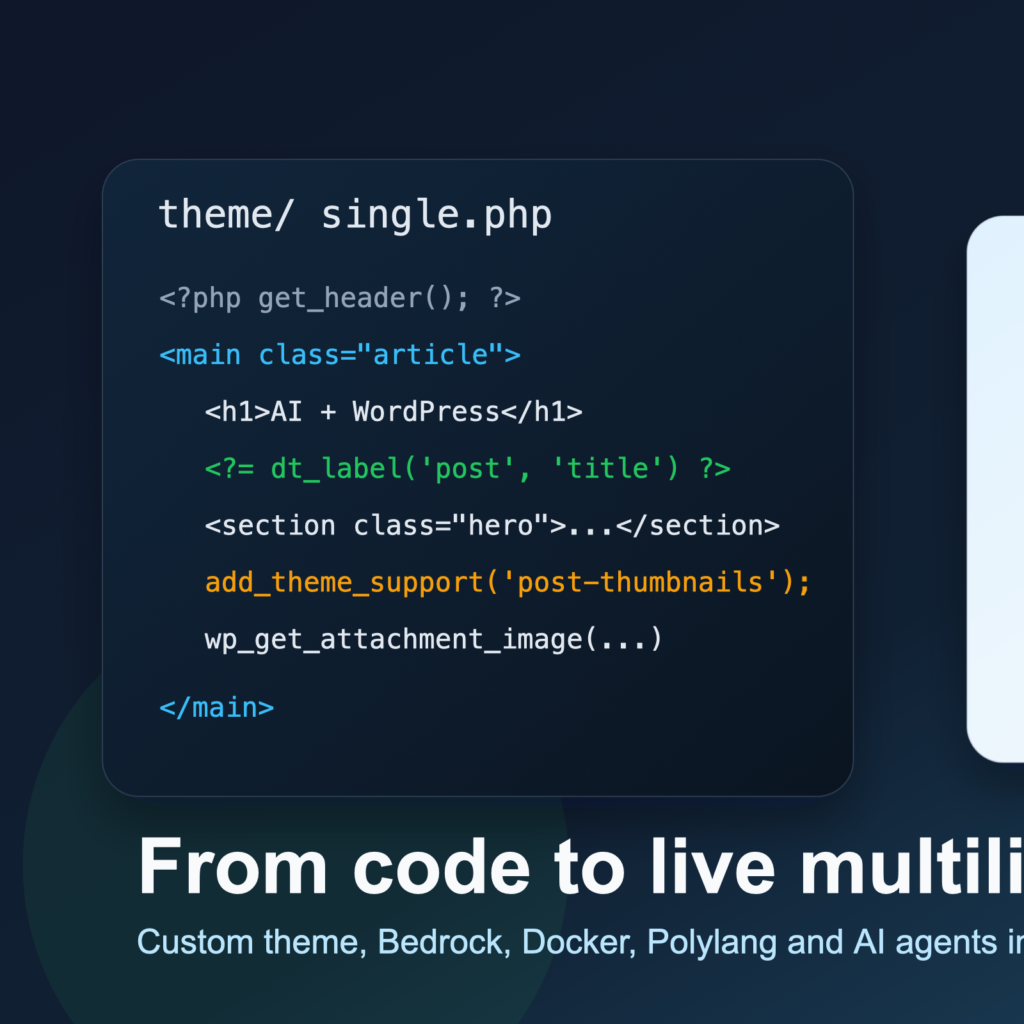
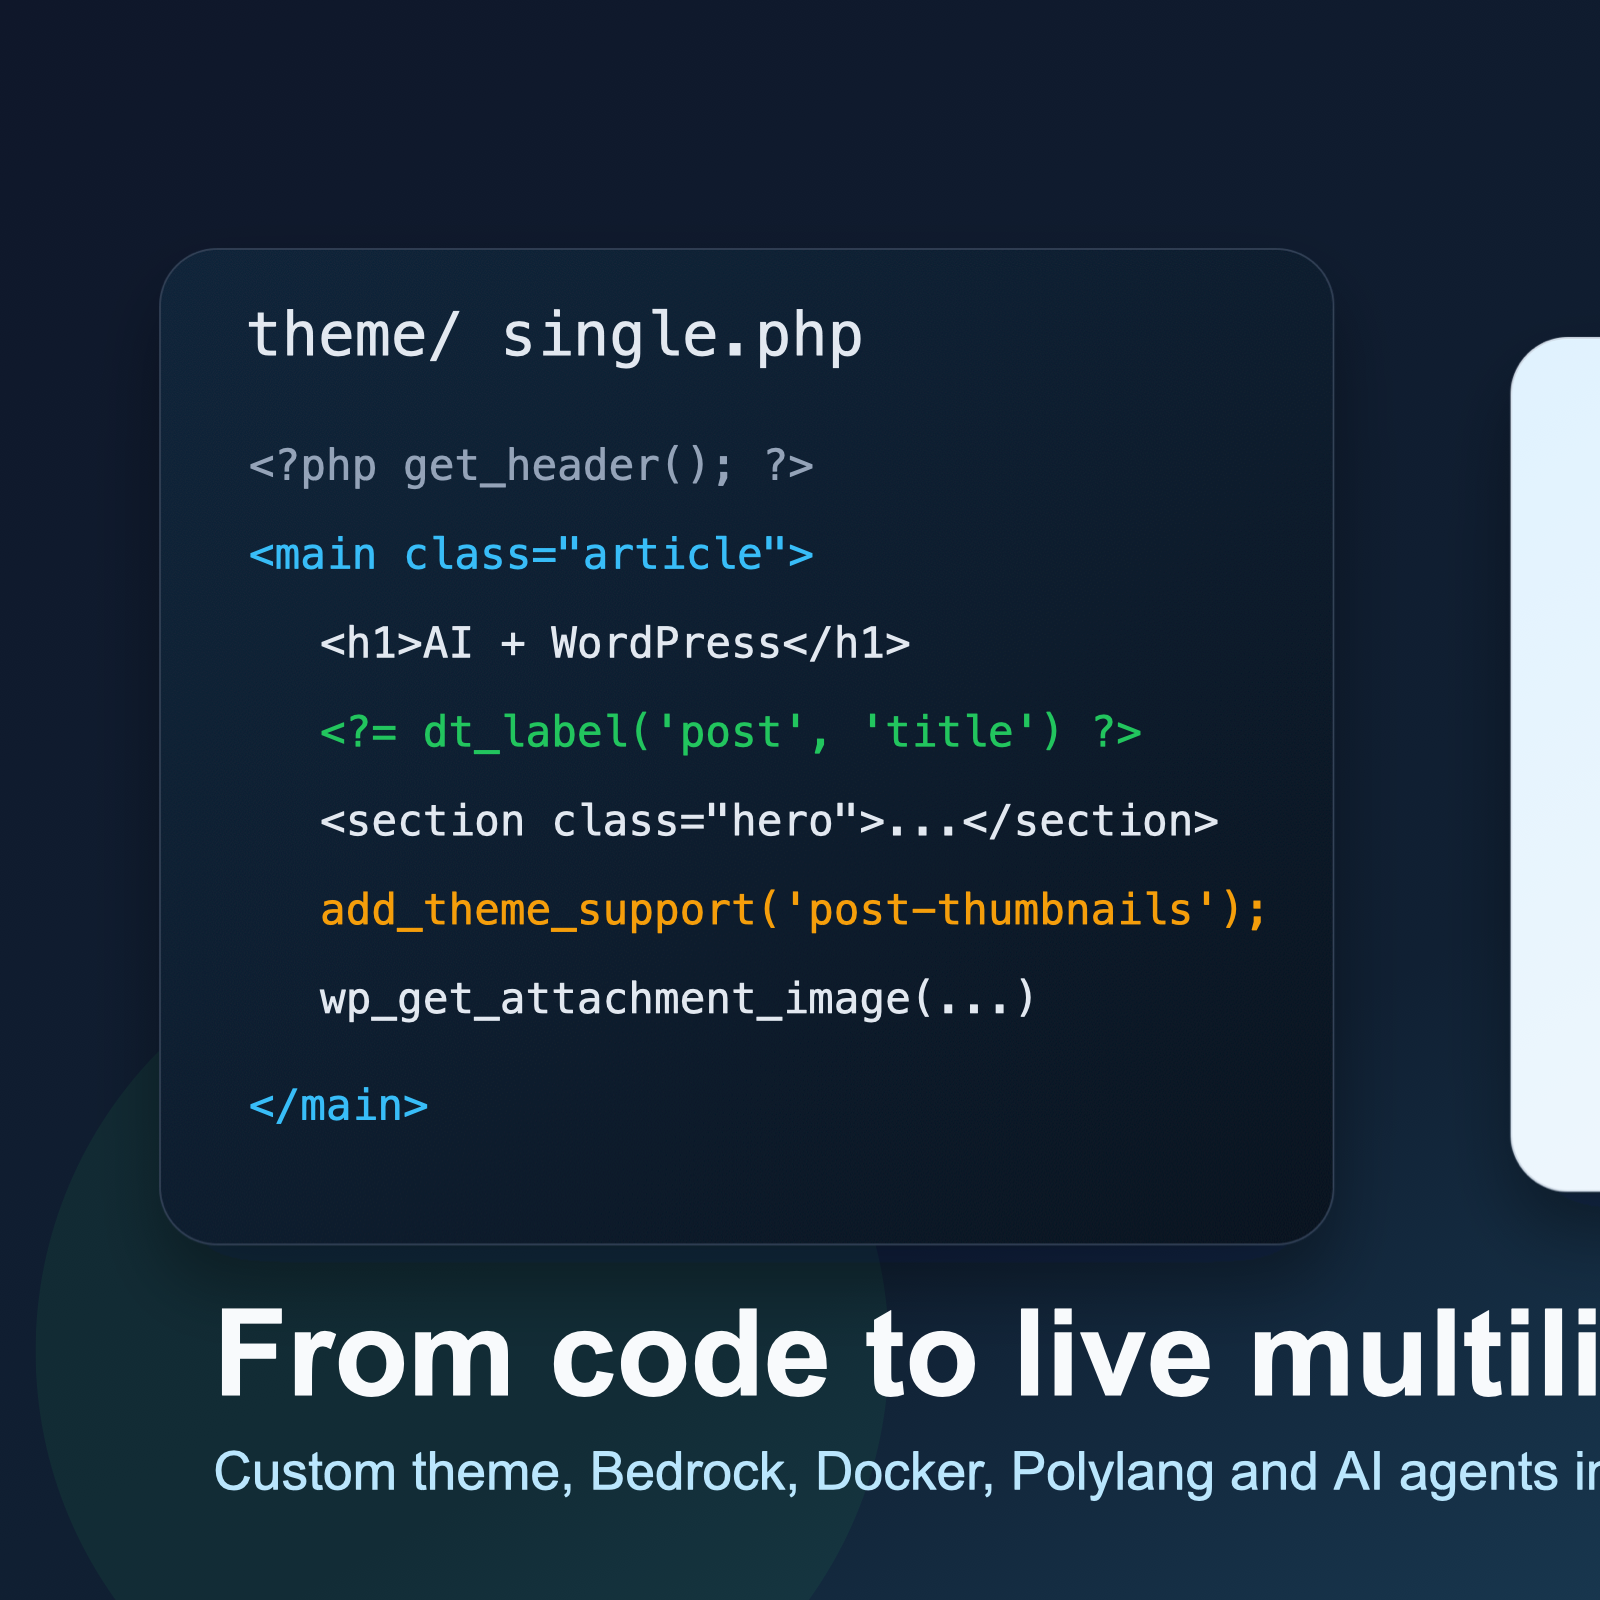
What if you could build a production-ready, multilingual WordPress theme — fully deployed on shared hosting — in a single afternoon? Not a child theme slapped on top of a bloated framework. A custom theme from scratch, zero JavaScript, every string editable from the admin panel, four languages, structured data for SEO, and sub-second load times.
That is exactly what I did. And in this article I am going to walk you through every decision, every tool, and every shortcut that made it possible.
I migrated my portfolio site from the Porto theme — a 2 MB jQuery monolith — to a lightweight custom WordPress theme built on WordPress Bedrock, developed inside Docker, made multilingual with Polylang, deployed to Hostinger shared hosting, and assembled in roughly six hours with the help of Claude Code, an AI coding assistant. Here is how.
Why Bedrock Instead of Standard WordPress
If you are still downloading WordPress from wordpress.org and uploading it via FTP, we need to talk. WordPress Bedrock is an opinionated WordPress boilerplate by Roots that treats WordPress as a proper application rather than a folder of PHP files you manually patch.
The key differences that sold me:
- Composer dependency management. Plugins, themes, and WordPress core itself are Composer packages. You declare them in
composer.json, runcomposer install, and get reproducible builds. No more “which version of that plugin did we have in production?” - Environment-based configuration. A
.envfile holds database credentials, debug flags, salts, and theWP_ENVvariable. Yourconfig/application.phpreads it. You never commit secrets. You have separate.envfiles for development, staging, and production. - Separation of concerns. WordPress core lives in
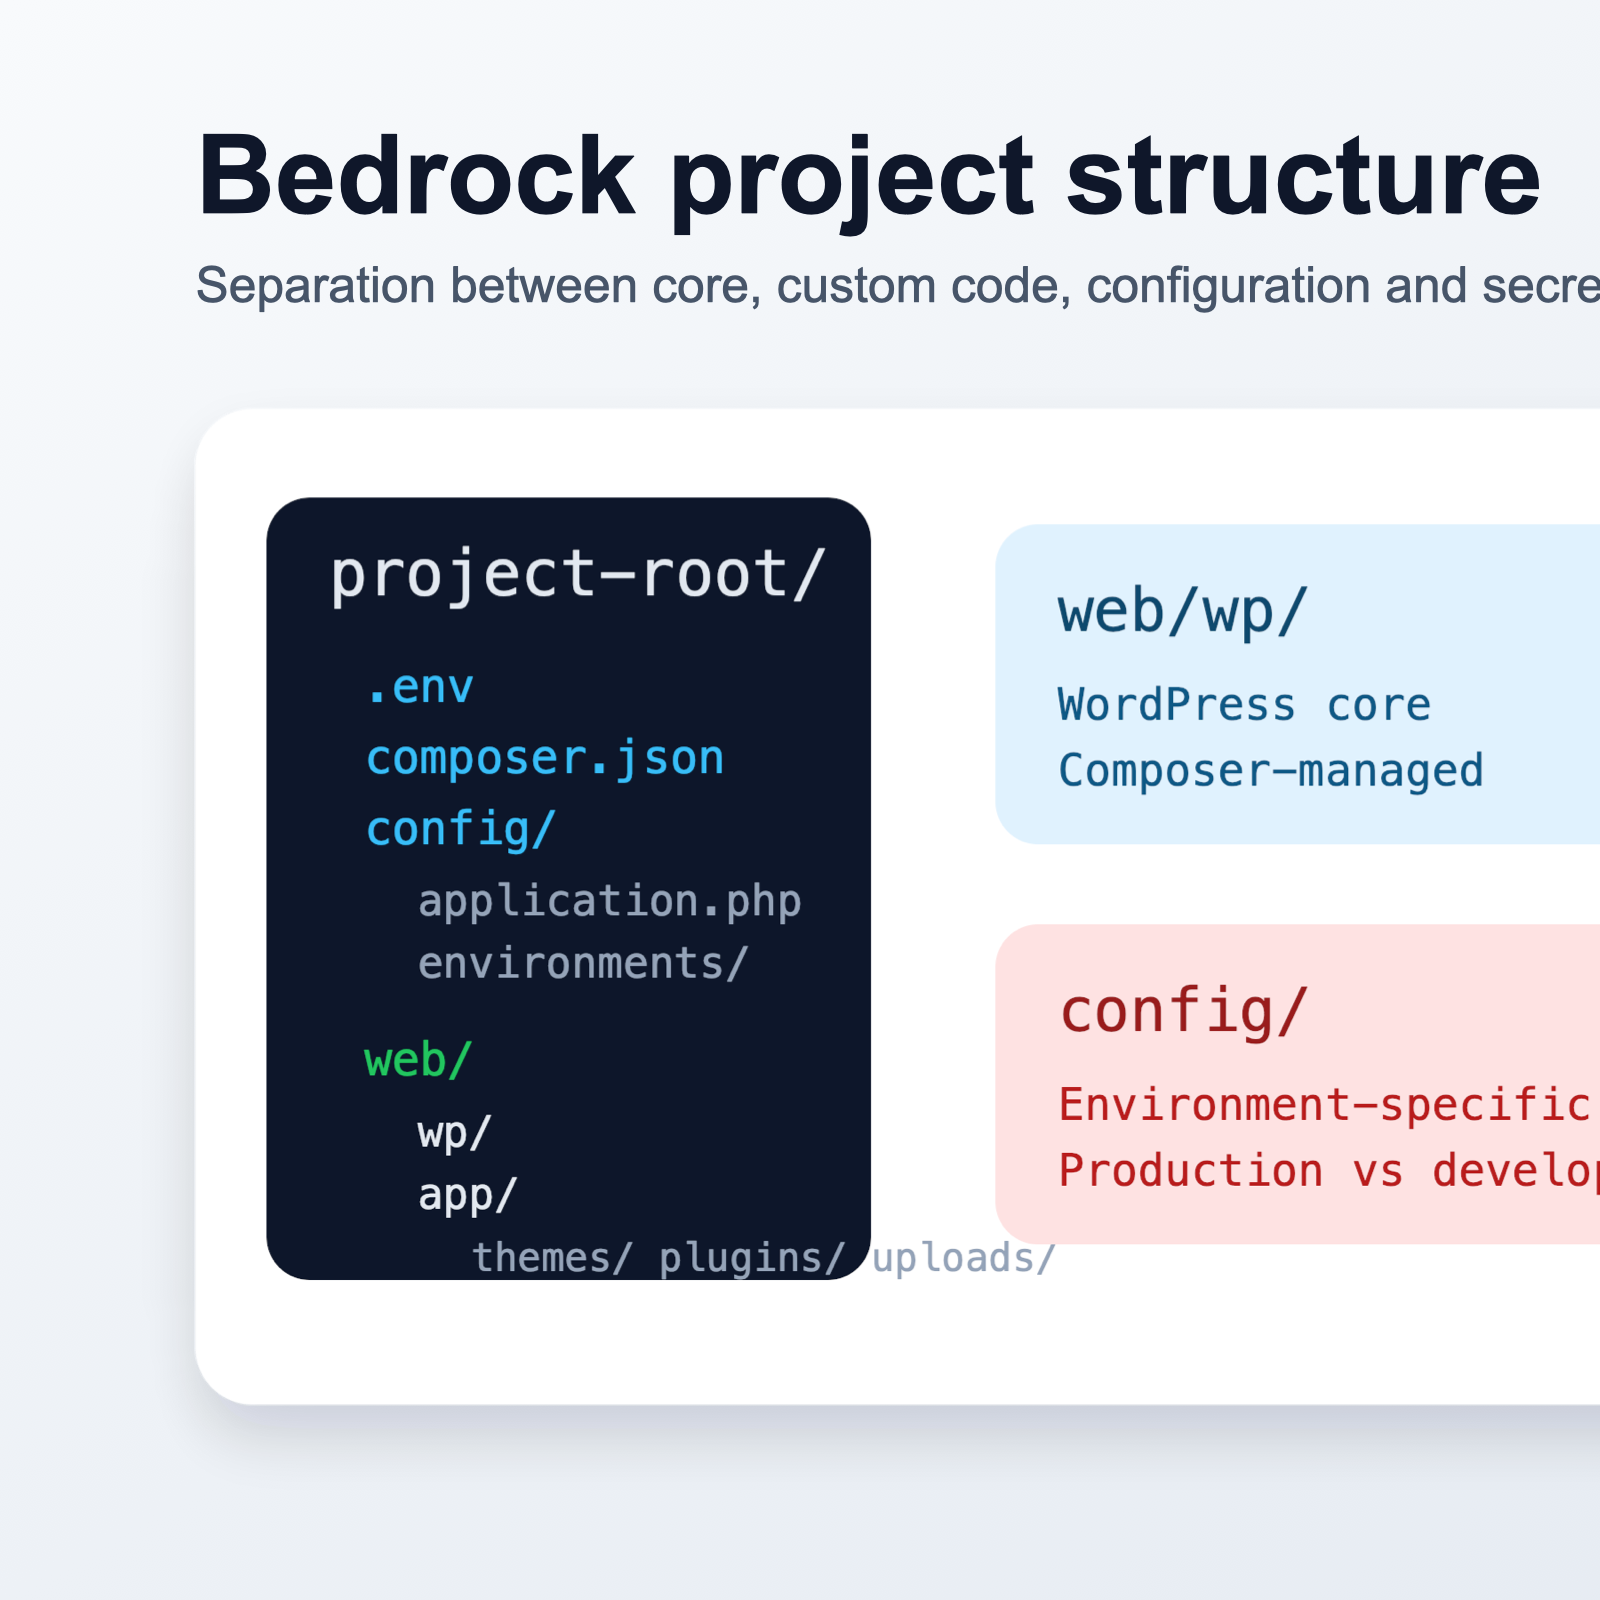
web/wp/and is gitignored. Your custom code — themes, must-use plugins, uploads — lives inweb/app/. This means your Git repository only tracks your code, not the 1,500+ files that ship with WordPress core. - Security. The web root is
web/, not the project root. Configuration files, Composer files, and.envsit above the document root. An attacker who gains directory traversal on the web server cannot trivially read your secrets.
Bedrock changes how you think about WordPress development. It stops being a CMS you configure through a browser and starts being a codebase you manage with version control, dependency managers, and environment variables — the same way you would manage a Laravel or Symfony project.
The Development Environment: Docker + Bedrock
Local development should be one command away from a working site. I use Docker with a docker-compose.yml that spins up two containers: PHP 8.4 on Ubuntu 24.04 with Apache, and MySQL 8.0 — matching the Hostinger production environment as closely as possible.
The Makefile wraps the common workflows:
make init    # First-time setup: build, install deps, install WP
make up      # Start containers
make down    # Stop containers
make shell   # Bash into the app container
make wp CMD="plugin list"  # Run WP-CLI commands
The entire web/ directory is bind-mounted into the container, so every file save is immediately reflected at http://localhost:8880. No build step, no file watcher, no waiting. You edit a template, refresh the browser, and see the result.
This Docker WordPress development setup also means onboarding is trivial. Clone the repo, copy .env.example to .env, run make init, and you have a working local site with the correct PHP version, the correct MySQL version, and all dependencies installed. Every developer on the team — or in my case, every AI agent — works against the same environment.
Building a Zero-JavaScript Custom Theme
Let me be blunt about why I ditched Porto. It is a popular premium theme, and it does a lot. But for a developer portfolio site, “a lot” is the problem:
- Over 30 JavaScript files loaded on every page, most jQuery-dependent
- Custom shortcodes that lock your content into the theme forever
- A visual builder that generates nested
divsoup - Page weight north of 2 MB before you add a single image
My design philosophy for the replacement was simple: pure CSS, no frameworks, modern CSS features, zero client-side JavaScript.
Modern CSS Is Enough
In 2026, you do not need Tailwind, Bootstrap, or any CSS framework for a portfolio site. Native CSS gives you everything:
clamp()for fluid typography that scales between mobile and desktop without a single media query for font sizes- CSS custom properties (variables) for a consistent color system and easy dark-mode support
- CSS Grid and Flexbox for every layout pattern you need
:has(),:is(), and container queries for component-level responsive behavior
Template Structure
The WordPress theme development followed standard template hierarchy conventions:
front-page.php— the main portfolio landing page with sections for hero, skills, experience, portfolio, and contacthome.php— the blog indexsingle.php— individual blog postsarchive.php— category and tag archivespage.php— generic pagesfunctions.php— kept lean, delegating to files ininc/
Performance Wins
By stripping out everything unnecessary, I achieved dramatic improvements:
- No jQuery. WordPress enqueues jQuery by default. I deregistered it. The site has zero JavaScript dependencies.
- No block library CSS. I am not using Gutenberg blocks on the front end, so the 80+ KB of block styles are dequeued.
- Minimal HTTP requests. One CSS file. Zero JS files. Fonts served locally, not from Google Fonts CDN.
- No render-blocking resources. With no scripts to defer and a single small stylesheet, the critical rendering path is as short as it gets.
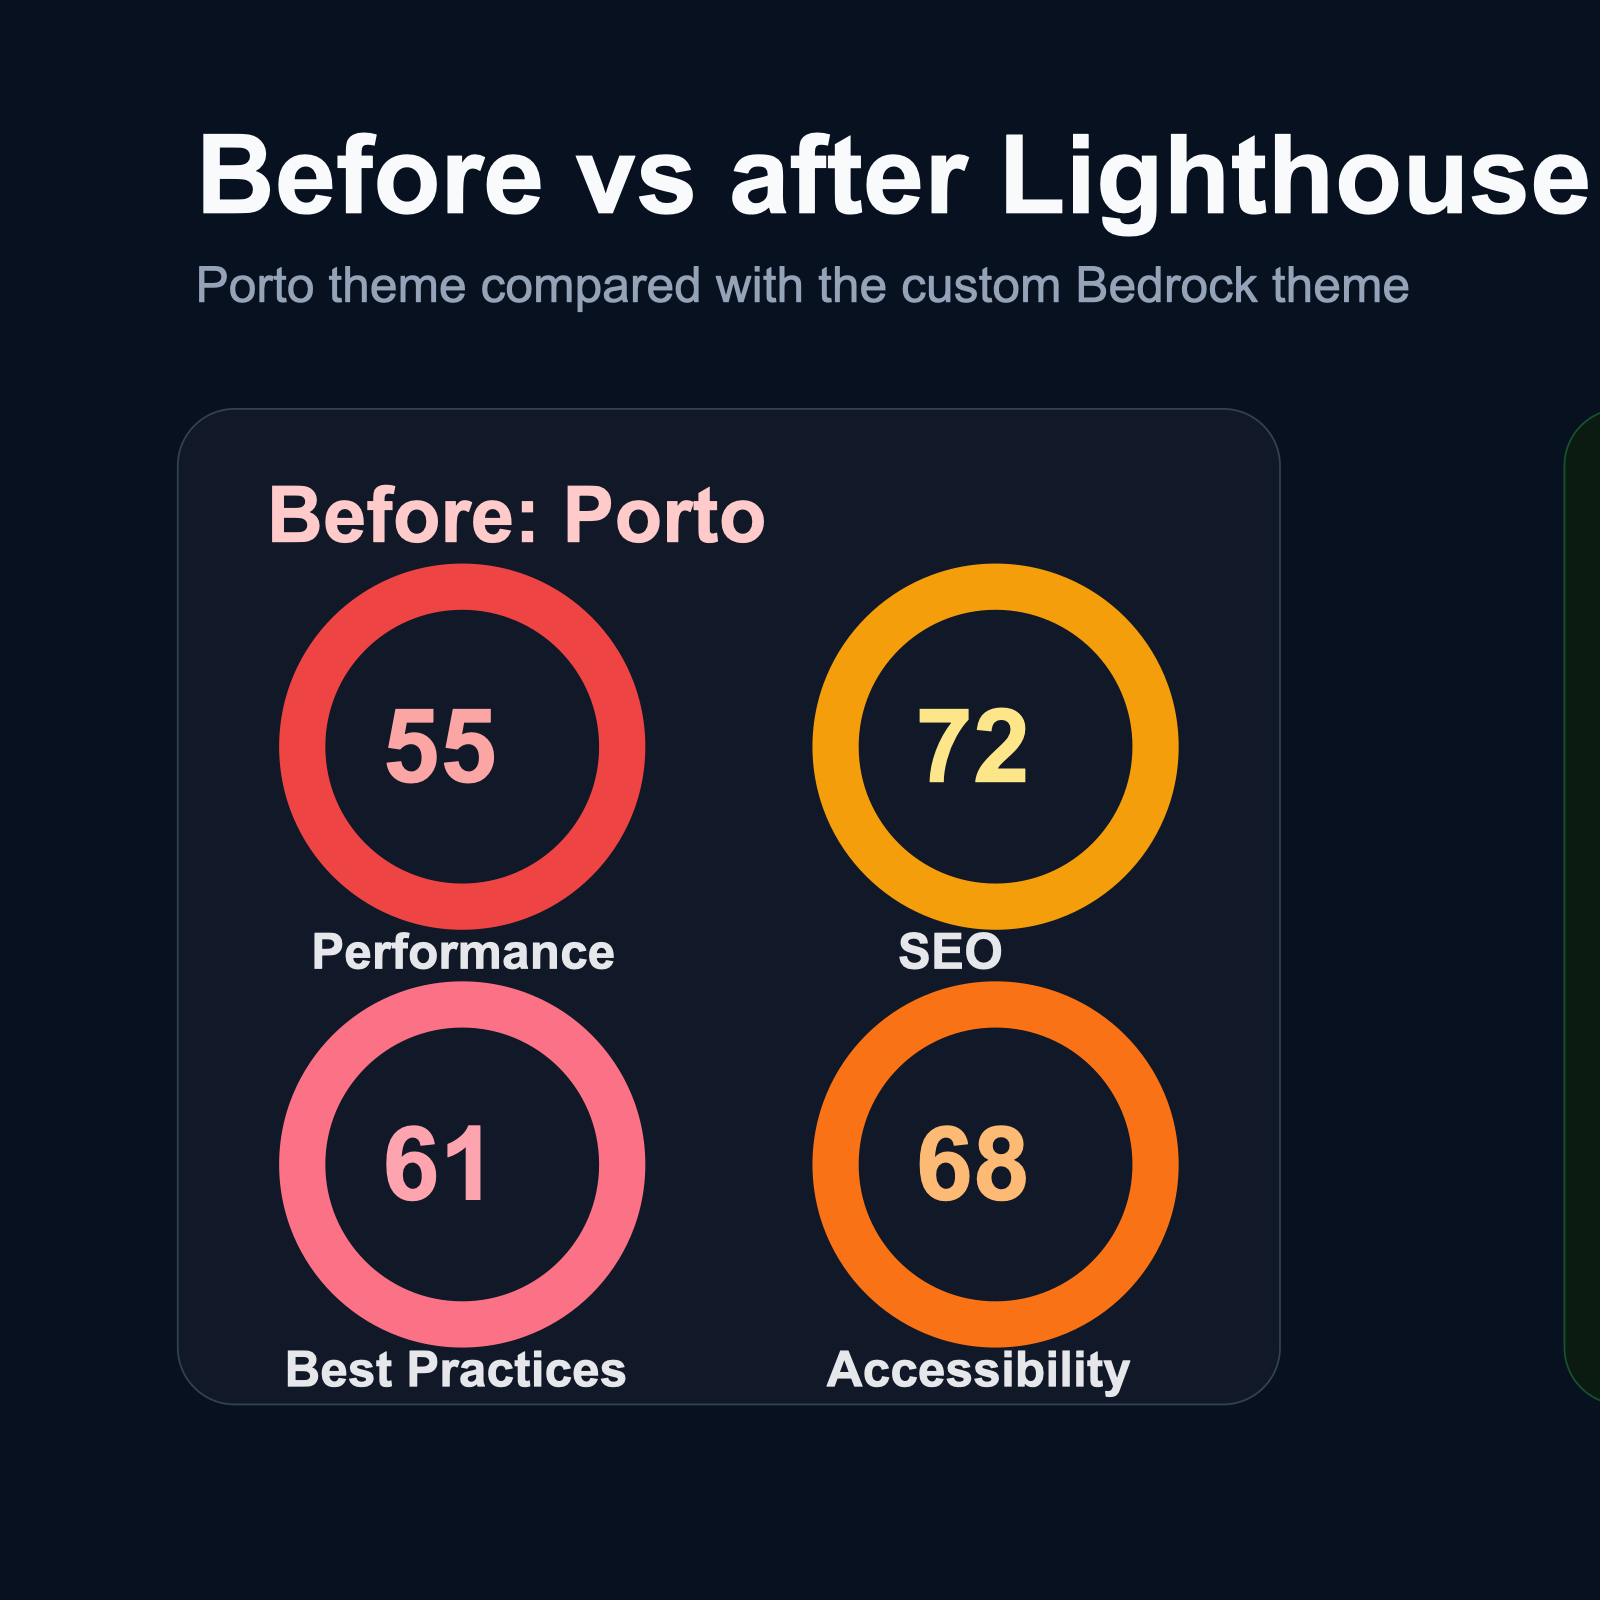
The result? Lighthouse scores consistently above 95 across Performance, Accessibility, Best Practices, and SEO. The total page weight for the front page dropped from over 2 MB to under 150 KB including images.
Making Every Text Editable: WordPress Customizer API
Here is where things got architecturally interesting. A multilingual site with four languages means every visible string on the site exists in four variants. The naive approach — hardcoding arrays of translations directly in templates — creates an unmaintainable mess. Change one string and you are grep-searching across six template files.
I needed a system where every piece of text is editable from the WordPress admin panel through the WordPress Customizer API, with sensible defaults baked into the theme.
The Architecture
The solution is a single source of truth: inc/customizer-config.php. This file returns a massive associative array that defines every text string the theme uses, organized by language, template, and key:
// inc/customizer-config.php
return [
    'shared' => [
        'site_title' => 'Oleksii Siniaiev',
        'job_title'  => 'Senior Full-Stack Engineer',
        // ...
    ],
    'en' => [
        'front' => [
            'hero_heading'    => 'Building Digital Solutions',
            'hero_subheading' => 'Full-stack engineer with 10+ years...',
            // ...
        ],
        'blog' => [
            'archive_title' => 'Blog',
            // ...
        ],
    ],
    'ru' => [
        'front' => [
            'hero_heading' => 'Создаю цифровые решения',
            // ...
        ],
    ],
    // uk, es...
];
Naming Convention
Every Customizer setting follows the pattern dt_{lang}_{template}_{key}. For example, dt_en_front_hero_heading is the English hero heading on the front page. The dt_ prefix stands for “developer theme” and prevents collisions with other plugins.
Helper Functions
Two helper functions keep templates clean:
// Get a language-specific label
dt_label('front', 'hero_heading');
// Internally: get_theme_mod('dt_{current_lang}_front_hero_heading', $default)

// Get a shared (language-independent) label
dt_shared('site_title');
// Internally: get_theme_mod('dt_shared_site_title', $default)
The helpers detect the current Polylang language, construct the setting name, call get_theme_mod(), and fall back to the default from the config file if no customization has been saved. This means the theme works perfectly out of the box — every string has a default — but every string can also be overridden from Appearance > Customize without touching code.
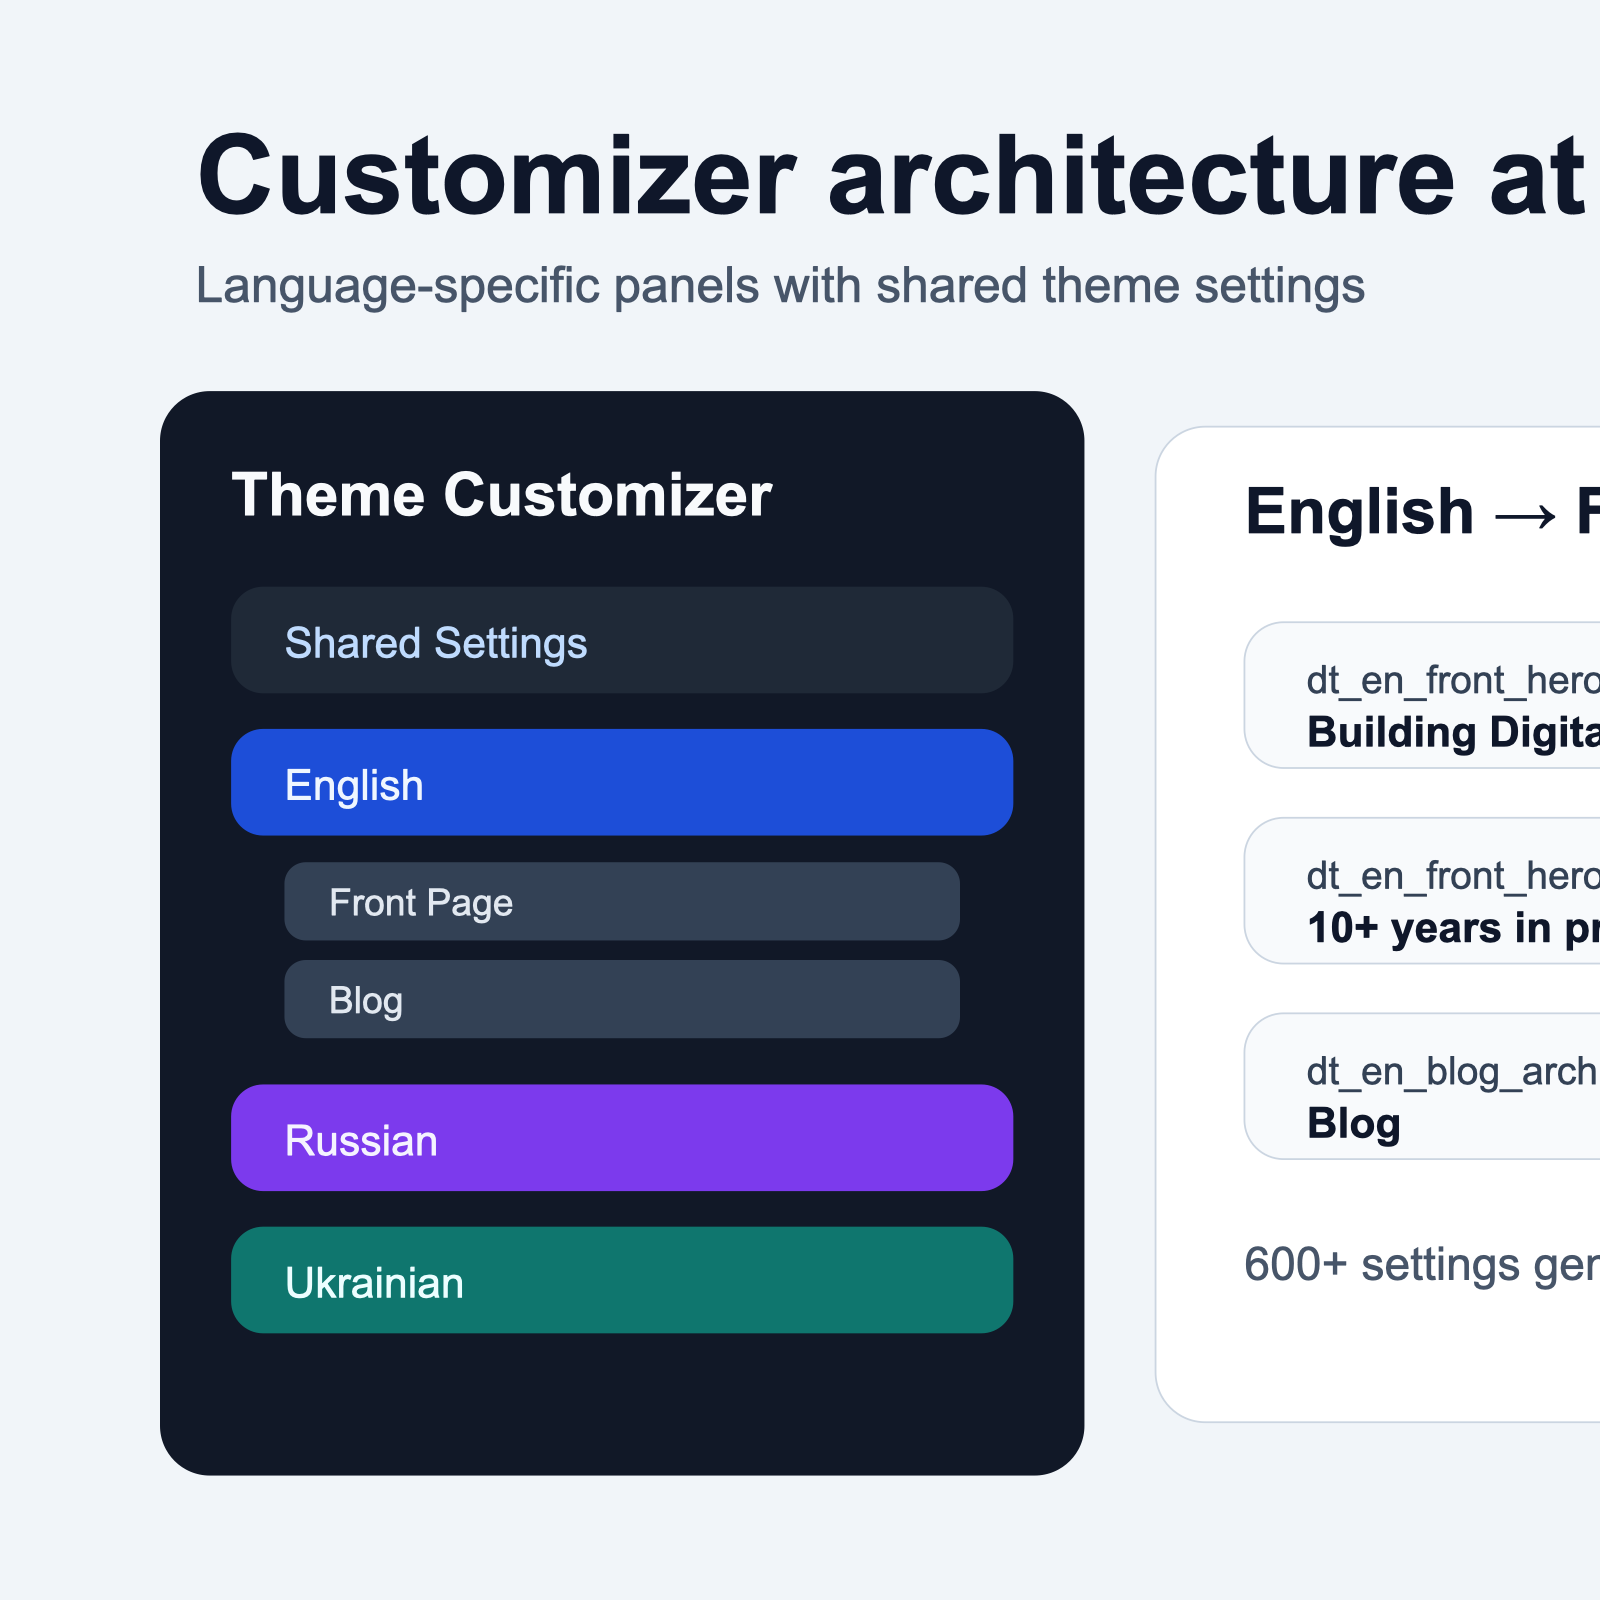
Panel Structure
In the Customizer, the settings are organized into panels: one Shared Settings panel for language-independent values (name, job title, social links) and four language-specific panels (English, Russian, Ukrainian, Spanish). Each language panel contains sections for each template. The total count exceeded 600 individual settings, all auto-registered from the config array.
Multilingual Setup with Polylang
Making a static front page work with Polylang multilingual on Bedrock required solving a few non-obvious problems.
The Static Front Page Challenge
WordPress allows you to set a static page as the front page. Polylang creates translation relationships between pages. So you need four pages — one per language — each set as the front page translation. Polylang handles this cleanly, but the URL structure needed attention.
I wanted clean language prefixes: /ru/, /uk/, /es/ for non-English content, with English as the default (no prefix). Polylang supports this natively through its “URL modifications” settings, using the directory format.
The Redirect Fix
One issue bit me: WordPress sometimes redirects the language-prefixed front page to the base URL, stripping the language prefix. The fix required a small must-use plugin that hooks into redirect_canonical and short-circuits the redirect when the requested URL is a valid Polylang language root.
URL Filters
Two Polylang filters proved essential:
pll_pre_translation_url— allows overriding the translation URL for any given page, which I used to ensure the front page translations always point to the language root rather than the page slugpll_additional_language_data— lets you inject extra data into the language objects, useful for associating hreflang attributes and custom flags
The language switcher itself is a simple ul rendered by a theme function that loops over Polylang’s language list, outputs anchor tags with the correct URLs, and marks the active language. No JavaScript, no dropdowns — just clean links.
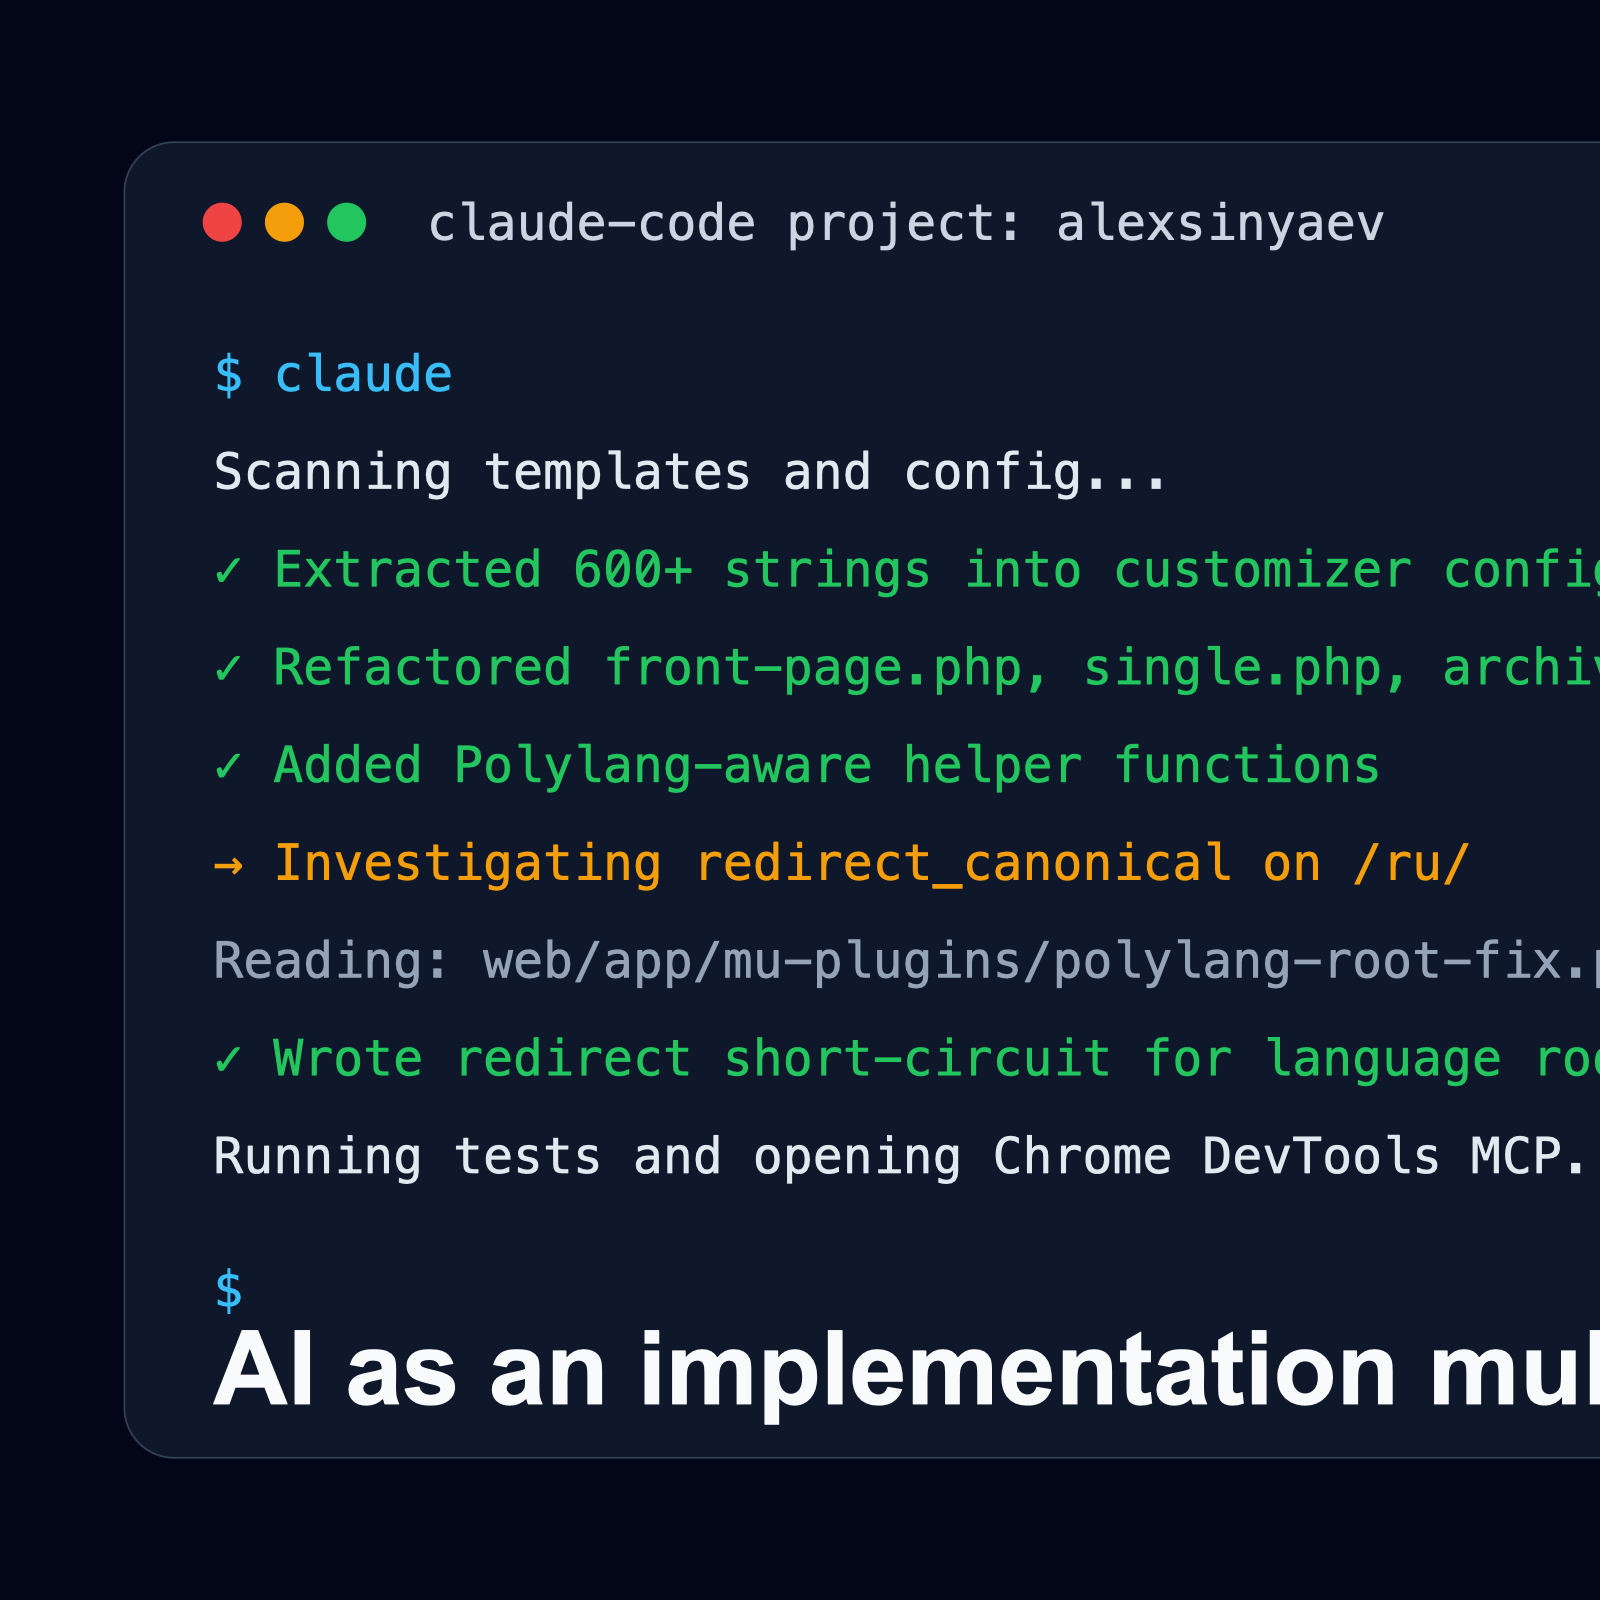
AI-Powered Development: How Claude Code Changed Everything
This is the section that turns a “solid but unremarkable” article into something worth reading in 2026. Because the honest truth is: I did not write most of this code by hand. I architected it, I reviewed it, I debugged the tricky parts, and I made every significant decision. But the bulk of the typing was done by Claude Code.
What Is Claude Code?
Claude Code is a CLI-based AI coding assistant from Anthropic. Unlike chat-based AI tools where you paste code snippets back and forth, Claude Code operates directly in your terminal. It reads your files, understands your project structure, writes code, runs commands, and iterates based on errors — all within your local environment. Think of it less as a chatbot and more as a senior developer who pair-programs with you at 10x speed.
How I Used It
The development process was collaborative. I would describe the architecture and constraints, and Claude Code would implement. Here are concrete examples of tasks I delegated to the AI:
- Extracting 600+ text strings into Customizer config. I had templates with hardcoded text in four languages. I described the desired config structure, the naming convention, and the helper function signatures. Claude Code read all six templates, extracted every translatable string, organized them into the config array, and generated the Customizer registration code — all in one pass. Doing this manually would have taken an entire day of tedious, error-prone copy-paste work.
-
Refactoring six templates simultaneously. After the config was ready, every template needed to be updated: replace hardcoded strings with
dt_label()calls. Claude Code processed all templates in parallel using sub-agents, maintaining consistency across files. -
Debugging Polylang URL issues. The canonical redirect problem I mentioned earlier? I described the symptom (language prefix getting stripped), and Claude Code traced through WordPress’s redirect logic, identified the
redirect_canonicalhook as the intervention point, and wrote the fix. - JSON-LD structured data. I asked for schema.org structured data for the front page (Person, WebSite, Organization) and blog posts (Article, BreadcrumbList). Claude Code generated the complete JSON-LD blocks with proper escaping and dynamic data from Customizer settings.
- Browser testing via MCP integration. Claude Code connected to Chrome DevTools through the Model Context Protocol, allowing it to inspect the rendered page, identify visual issues, and fix CSS — all without me switching windows.
Time Savings
Here is my honest estimate of time spent versus time it would have taken without AI assistance:
- Theme scaffolding and base templates: 30 minutes with AI vs. 3-4 hours manually
- CSS styling (responsive, all sections): 1 hour with AI vs. 4-5 hours manually
- Customizer config + registration (600+ settings): 45 minutes with AI vs. 8+ hours manually
- Template refactoring to use helpers: 30 minutes with AI vs. 3-4 hours manually
- Polylang integration and debugging: 1 hour with AI vs. 3-4 hours manually
- Structured data, accessibility, final polish: 1.5 hours with AI vs. 4-5 hours manually
- Total: ~6 hours with AI vs. 25-30 hours without
That is roughly a 4-5x productivity multiplier.
The Critical Caveat
AI is a multiplier, not a replacement. You still need to understand WordPress internals, Bedrock’s architecture, Polylang’s hooks, CSS layout models, and deployment workflows. Claude Code is phenomenally fast at implementation, but it needs clear architectural direction. The six hours included significant time spent thinking about structure, reviewing generated code, and making design decisions that no AI suggested on its own.
If I had no WordPress experience and asked an AI to “build me a portfolio site,” the result would be mediocre at best. The value of AI-powered development comes from combining deep domain knowledge with AI’s ability to execute at speed. You are the architect; the AI is a very fast, very tireless builder.
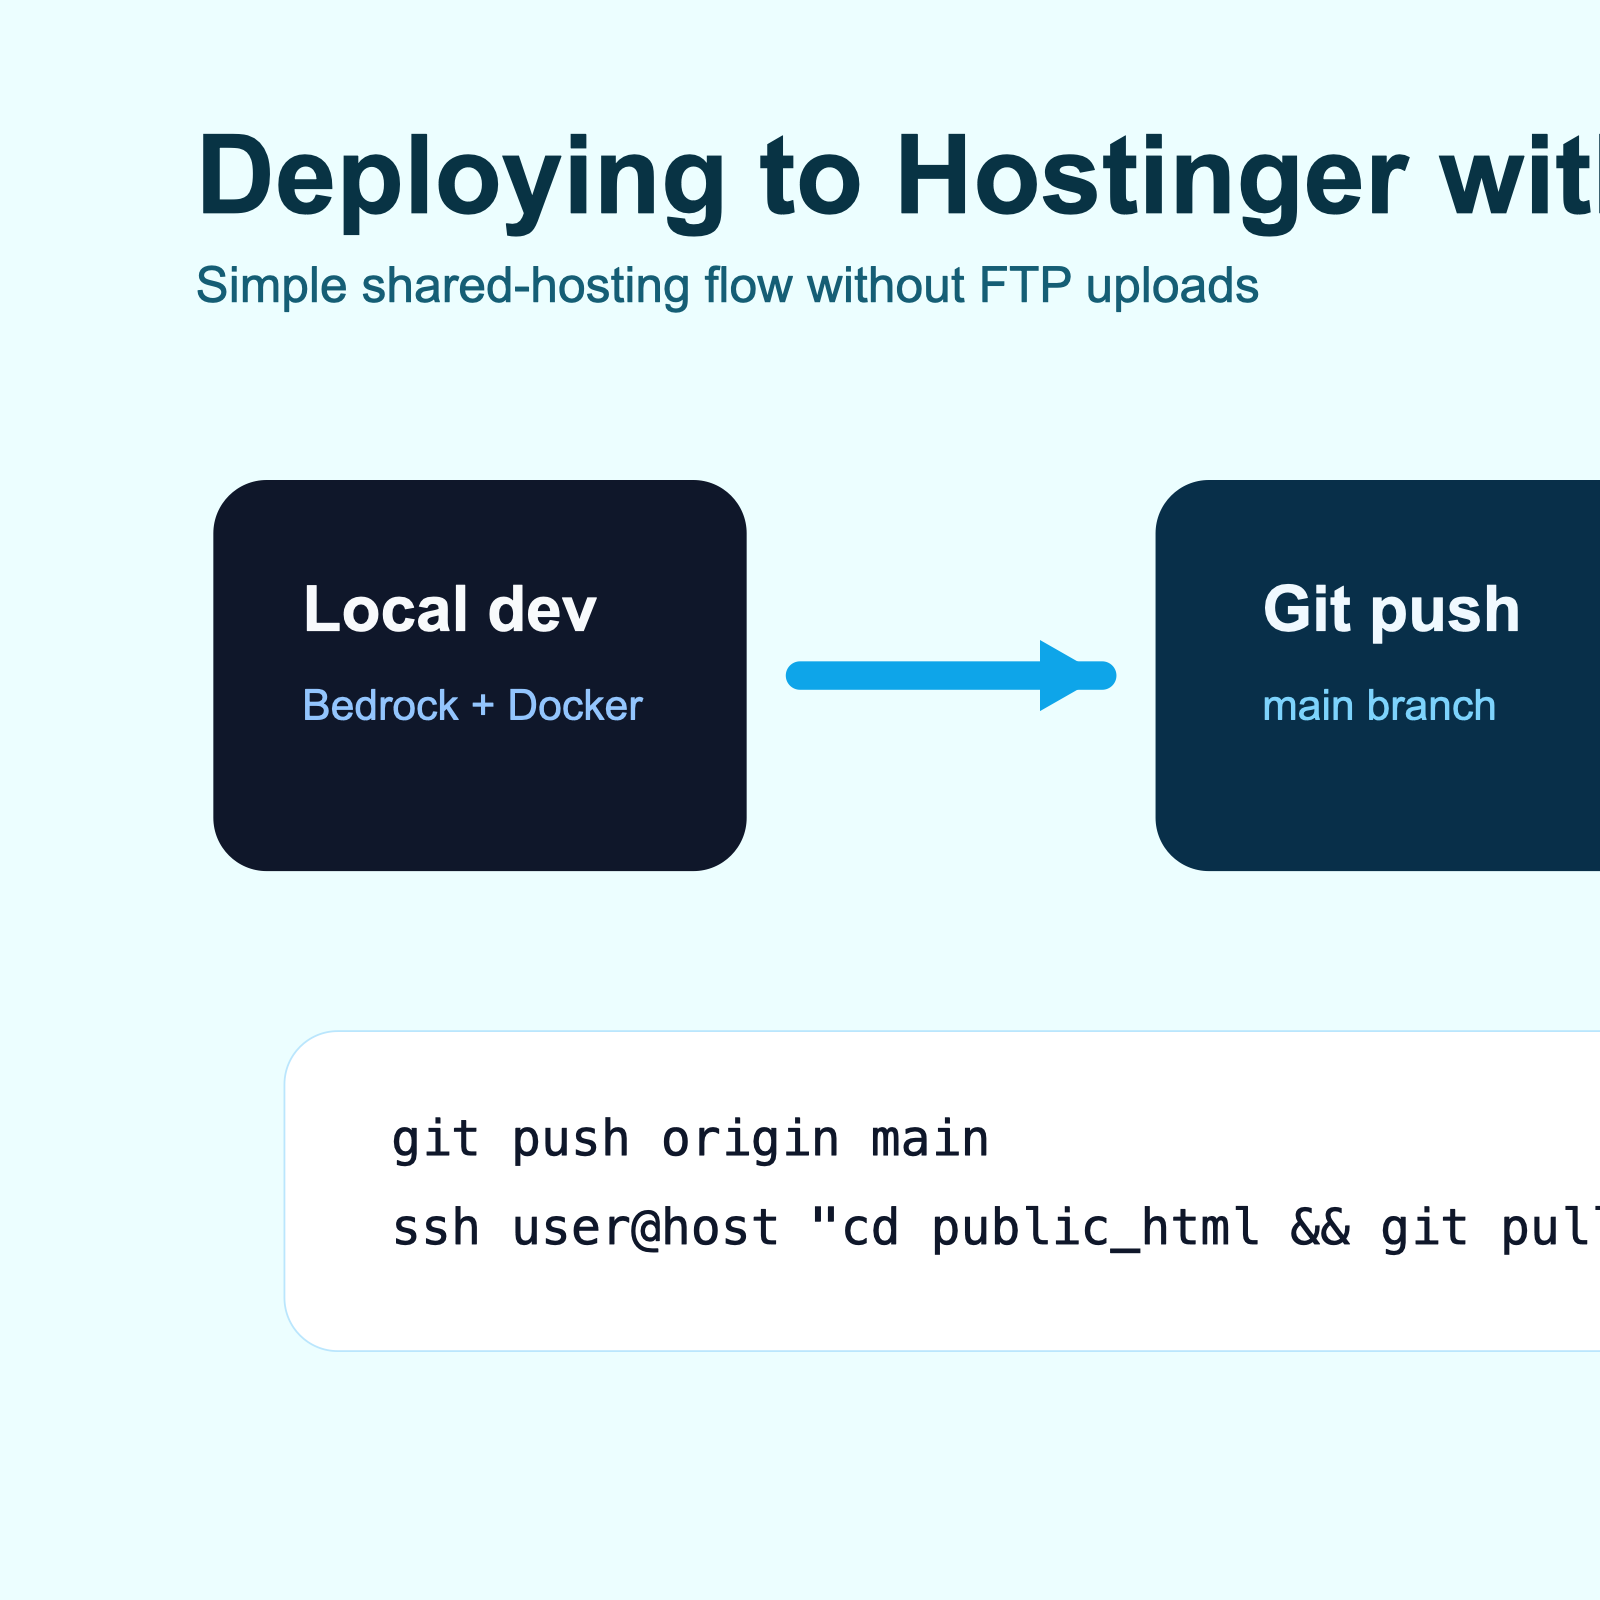
Deploying to Hostinger via Git
Hostinger shared hosting supports SSH access on their Business and Cloud plans, which opens the door to Git-based deployment instead of FTP uploads.
The Deployment Flow
- Initial setup (one-time): SSH into Hostinger, clone the repository into the
public_htmldirectory, runcomposer install --no-dev, and create the production.envfile with real database credentials,WP_ENV=production, and production URLs. - Subsequent deploys: Push to the Git remote, SSH in, run
git pull && composer install --no-dev. That is the entire deployment process. - Verify: Hit the production URL, check a few pages, confirm languages switch correctly.
Production Configuration
The .env file on Hostinger differs from local development:
WP_ENV=production
WP_HOME=https://alexsinyaev.com
WP_SITEURL=https://alexsinyaev.com/wp
DB_HOST=localhost
DB_NAME=production_db
DB_USER=production_user
DB_PASSWORD=<strong-password>
Because Bedrock reads everything from .env, the same codebase runs identically in development and production — only the environment variables change.
LiteSpeed Cache
Hostinger runs LiteSpeed Web Server, which means the LiteSpeed Cache plugin provides server-level page caching with zero configuration. Combined with the already minimal page weight of the custom theme, time-to-first-byte in production is consistently under 200ms, and fully loaded pages render in under 1 second.
Results and Key Takeaways
After six hours of development and deployment, here is what the project achieved:
- Page weight: from 2+ MB (Porto) to under 150 KB (custom theme) — a 93% reduction
- Lighthouse Performance: from ~55 to 98-100
- Lighthouse Accessibility: 100
- Lighthouse SEO: 100
- JavaScript loaded: from 30+ files to zero
- Time to Interactive: from 4+ seconds to under 0.5 seconds
- Languages supported: 4 (English, Russian, Ukrainian, Spanish)
- Admin-editable text strings: 600+
- Structured data: JSON-LD for Person, WebSite, Article, BreadcrumbList
Lessons Learned
- Bedrock is worth the learning curve. The initial setup is more complex than vanilla WordPress, but WordPress Composer-based management pays dividends from day one. Dependencies are explicit. Environments are isolated. Deployments are reproducible.
- You do not need JavaScript for a portfolio site. Modern CSS handles responsive layouts, animations, smooth scrolling, and interactive elements like hamburger menus. The zero-JavaScript theme approach is not a limitation — it is a feature.
- The Customizer API is underrated. In the age of Gutenberg and Full Site Editing, the WordPress Customizer API is often overlooked. But for a theme with structured, repeatable content sections, it provides a superior editing experience: live preview, organized panels, and type-safe settings.
- AI shines at repetitive-but-precise tasks. Extracting hundreds of strings, maintaining naming conventions across files, generating boilerplate with consistent patterns — these are tasks where humans lose focus and make errors, but AI handles flawlessly.
- Docker parity with production prevents surprises. Running PHP 8.4 and MySQL 8.0 locally, matching Hostinger’s stack, meant zero deployment issues related to version differences.
- Invest time in architecture, not typing. The most valuable hours were spent deciding on the Customizer config structure and the helper function API. Once that architecture was clear, implementation — whether by human or AI — was straightforward.
Beginner’s Guide: Setting Up This Stack from Scratch
If you are new to any of the tools mentioned above, this section is for you. Below is a step-by-step walkthrough of every tool you need, how to install it, and how the pieces fit together.
Step 1: Install the Prerequisites
Before writing a single line of WordPress code, you need these tools on your machine:
- Git — version control. Download from
git-scm.comor install via Homebrew on macOS:brew install git. On Windows, use Git for Windows. Verify withgit --version. - Docker Desktop — containerized development environment. Download from
docker.com. On macOS, OrbStack is a faster, lighter alternative. After installation, verify withdocker --version. - Composer — PHP dependency manager. Install globally:
brew install composeron macOS or followgetcomposer.orgfor other OS. Verify withcomposer --version. - Node.js (optional) — only needed if you plan to use build tools. Install via
nodejs.orgorbrew install node. - PhpStorm or VS Code — your IDE. PhpStorm has the best WordPress and PHP support out of the box. VS Code is free and excellent with the right extensions.
Step 2: Set Up PhpStorm for WordPress Development
If you chose PhpStorm:
- Open the project folder (the Bedrock root, not the
web/subfolder). - Go to Settings > PHP > Composer and point it to your
composer.json. - Go to Settings > PHP > Frameworks and enable WordPress integration, pointing the WordPress path to
web/wp/. - Install the .env files support plugin for syntax highlighting of your environment files.
- For Docker integration: Settings > Build, Execution, Deployment > Docker — add your Docker connection. PhpStorm can run commands inside containers directly.
- Set up a PHP Remote Interpreter using the Docker container, so code completion, inspections, and debugging use PHP 8.4 from the container rather than your local PHP.
If you chose VS Code, install these extensions: PHP Intelephense, WordPress Snippets, Docker, DotENV, and EditorConfig.
Step 3: Clone and Bootstrap the Project
# Clone the Bedrock-based WordPress project
git clone [email protected]:your-username/your-project.git
cd your-project

# Copy the environment file
cp .env.example .env
# Edit .env with your local database credentials

# Start Docker containers
make init   # or: docker compose up -d && docker compose exec app composer install

# Visit http://localhost:8880 — your site is live
If this is a brand new project (not cloning an existing one), start with Bedrock directly:
composer create-project roots/bedrock my-wordpress-site
cd my-wordpress-site
Step 4: Understand the Bedrock Directory Structure
my-wordpress-site/
  .env                  # Database creds, WP_HOME, WP_ENV (never commit this)
  composer.json         # All dependencies: plugins, themes, WP core
  config/
    application.php     # Reads .env, defines WP constants
    environments/
      development.php   # Debug ON, file mods allowed
      production.php    # Debug OFF, secure settings
  web/                  # Document root (Apache/Nginx points here)
    wp/                 # WordPress core (Composer-installed, gitignored)
    app/
      mu-plugins/       # Must-use plugins (always active, no UI)
      plugins/          # Regular plugins
      themes/           # Your custom themes go here
      uploads/          # Media (gitignored)
    wp-config.php       # Bootstraps Bedrock config
    index.php           # Front controller
Step 5: Create Your Custom Theme
Inside web/app/themes/, create your theme folder:
mkdir web/app/themes/my-theme
touch web/app/themes/my-theme/style.css
touch web/app/themes/my-theme/functions.php
touch web/app/themes/my-theme/index.php
The style.css header tells WordPress about your theme:
/*
Theme Name: My Theme
Theme URI: https://example.com
Author: Your Name
Version: 1.0
*/
Activate it via WP-CLI: wp theme activate my-theme or from the admin panel under Appearance > Themes.
Step 6: Set Up Claude Code (AI Assistant)
Claude Code is installed via npm:
npm install -g @anthropic-ai/claude-code
claude
Navigate to your project directory and run claude. It will index your codebase and you can start giving it tasks:
- “Read all template files and list every hardcoded string” — research task
- “Create a WordPress Customizer registration file for these settings” — code generation
- “Refactor front-page.php to use dt_label() instead of $l[‘key’]” — refactoring
- “Debug why the language switcher shows /ru/home-2/ instead of /ru/” — debugging
Pro tips for working with AI coding assistants:
- Be specific about architecture. “Create a helper function” is vague. “Create a function
dt_label($key, $group)that callsget_theme_mod()with a default from the config array” is actionable. - Create a CLAUDE.md file in your project root with project context, commands, and architecture notes. Claude Code reads this automatically.
- Use plan mode for complex tasks. Type
/planto have Claude Code design an approach before writing code. - Review everything. AI-generated code should be reviewed with the same rigor as a pull request from a junior developer.
Step 7: Git Workflow
A minimal but effective Git workflow for solo WordPress development:
# Check what changed
git status
git diff

# Stage and commit
git add web/app/themes/my-theme/
git commit -m "Add hero section to front page template"

# Push to remote
git push origin main

# Deploy to production (via SSH)
ssh user@server "cd /path/to/project && git pull origin main"
Key rules:
- Never commit
.envfiles (they contain secrets). - Never commit
web/wp/orvendor/— these are Composer-managed. - Always commit
composer.lock— it ensures everyone gets the exact same dependency versions. - Write descriptive commit messages: “Fix Polylang language switcher URL for static front page” beats “fix stuff”.
Step 8: Deploy to Hostinger
- Get a Hostinger Business or Cloud plan (SSH access required).
- SSH into your server:
ssh -p 65002 username@server-ip. - Clone your repo into the web root:
git clone [email protected]:you/project.git ~/domains/yourdomain.com. - Install dependencies:
cd ~/domains/yourdomain.com && composer install --no-dev. - Create
.envwith production database credentials andWP_ENV=production. - Point Hostinger’s document root to the
web/folder (via Hostinger panel > Advanced > Folder Index, or.htaccess). - Enable LiteSpeed Cache plugin for server-level caching.
- For future updates:
ssh server && cd project && git pull. Done.
Recommended Learning Path
If this is all new to you, here is the order I would learn these tools:
- Git basics — commit, push, pull, branches. Takes 2-3 hours to learn the essentials.
- Docker fundamentals — containers, images, docker-compose. Takes an afternoon.
- WordPress theme development — template hierarchy, the loop, hooks and filters. The official WordPress developer handbook is excellent.
- Bedrock setup — Roots documentation walks you through it step by step.
- Claude Code — install it and start using it on real tasks. The best way to learn is by doing.
You do not need to master everything before starting. Learn just enough of each tool to be dangerous, then build something real. The gaps in your knowledge will become obvious quickly, and you will learn faster by solving actual problems than by reading tutorials.
Conclusion
AI-assisted WordPress development is not a future possibility — it is a practical reality in 2026. The combination of WordPress Bedrock for professional project structure, Docker for reproducible environments, the WordPress Customizer API for admin-editable content, Polylang for multilingual support, and Claude Code for AI-powered implementation created a workflow that compressed weeks of work into an afternoon.
You do not need a heavyweight premium theme for a professional portfolio. You do not need page builders, CSS frameworks, or JavaScript libraries. What you need is a clear architecture, the right tools, and — increasingly — an AI assistant that can turn your architectural decisions into working code at remarkable speed.
If you are considering building a custom WordPress theme in 2026, here is my recommendation: start with Bedrock, set up Docker to match your production environment, define your data architecture before writing templates, and use an AI coding assistant for the implementation work. You will be surprised how much you can accomplish in a single afternoon.
The source code for this project is available on my GitHub. If you have questions about the Bedrock setup, the Customizer architecture, or the AI-assisted workflow, feel free to reach out.